


Add Login to Your UWP application
This tutorial demonstrates how to add user login to a UWP C# application using Auth0. We recommend that you log in
to follow this quickstart with examples configured for your account.You need the following information:
1
System Requirements
This tutorial and sample project have been tested with the following: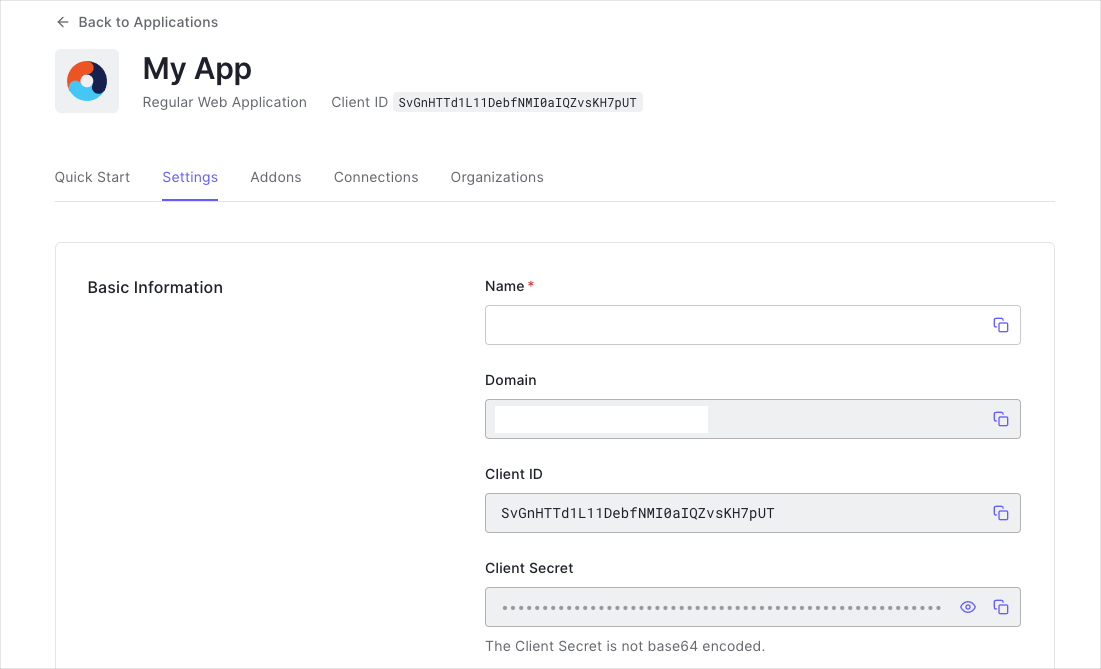 You need the following information:markdownlint-disable MD002 MD041markdownlint-disable MD002 MD041
- Microsoft Visual Studio 2022
- Windows 10 SDK (10.0.26100.0)
- Auth0.OidcClient.UWP 4.0.0
New to Auth? Learn How Auth0 works, how it integrates with Native Applications and which protocol it uses.
Get Your Application Keys
When you signed up for Auth0, a new application was created for you, or you could have created a new one. You will need some details about that application to communicate with Auth0. You can get these details from the Application Settings section in the Auth0 dashboard.When using the Default App with a Native or Single Page Application, ensure to update the
Token Endpoint Authentication Method to
None and set the
Application Type to either SPA or Native.- Domain
- Client ID
If you download the sample from the top of this page, these details are filled out for you.
Configure Callback URLs
A callback URL is a URL in your application where Auth0 redirects the user after they have authenticated. The callback URL for your app must be added to the Allowed Callback URLs field in your Application Settings. If this field is not set, users will be unable to log in to the application and will get an error.If you are following along with the sample project you downloaded from the top of this page, you should
set the Allowed Callback URLs to
https://dev-gja8kxz4ndtex3rq.us.auth0.com/mobile.Configure Logout URLs
A logout URL is a URL in your application that Auth0 can return to after the user has been logged out of the authorization server. This is specified in thereturnTo query parameter. The logout URL for your
app must be added to the Allowed Logout URLs field in your Application Settings. If this field is not set, users will be unable to log out from the
application and will get an error.If you are following along with the sample project you downloaded from the top of this page, the
logout URL you need to add to the Allowed Logout URLs field is
https://dev-gja8kxz4ndtex3rq.us.auth0.com/mobile.2
Configure Auth0
Get Your Application Keys
When you signed up for Auth0, a new application was created for you, or you could have created a new one. You will need some details about that application to communicate with Auth0. You can get these details from the Application Settings section in the Auth0 dashboard.When using the Default App with a Native or Single Page Application, ensure to update the
Token Endpoint Authentication Method to
None and set the
Application Type to either SPA or Native.- Domain
- Client ID
If you download the sample from the top of this page, these details are filled out for you.
3
Install Dependencies
Use the NuGet Package Manager Console (Tools -> NuGet Package Manager -> Package Manager Console) to
install the
Auth0.OidcClient.UWP package, running the command:4
Trigger Authentication
To integrate Auth0 login into your application, simply instantiate an instance of the You can then call the 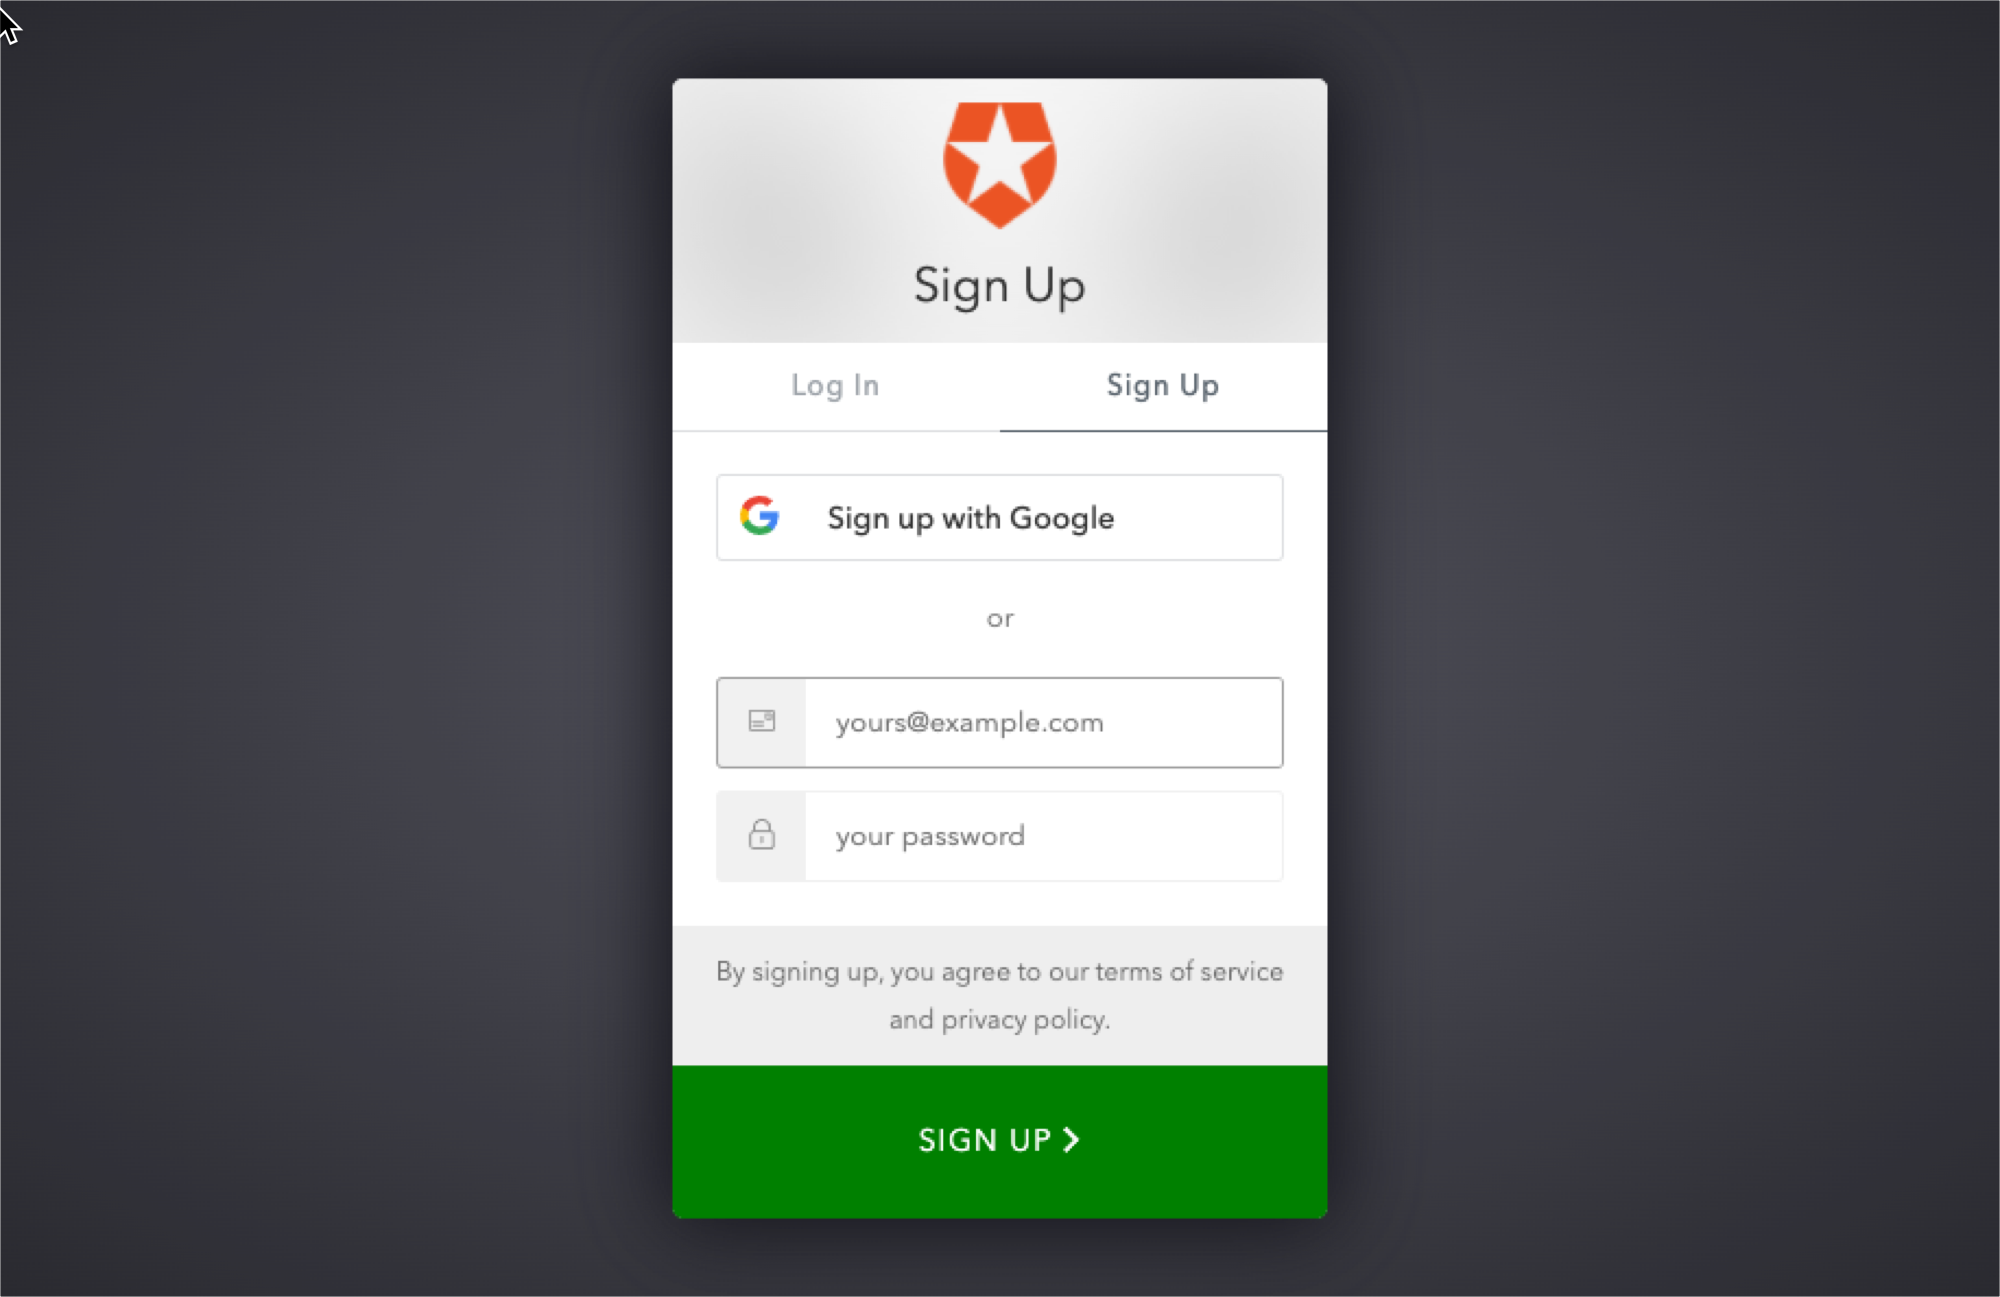 This loads the Auth0 login page into a web view. You can learn how to customize the login page at this document.
Auth0Client
class, configuring the Auth0 Domain and Client ID:LoginAsync method to log the user in:5
Handle Authentication Tokens
The returned login result indicates whether authentication was successful, and if so contains the tokens and
claims of the user.You can obtain a list of all the claims contained in the ID Token by iterating through the
Authentication Error
You can check theIsError property of the result to see whether the login has failed. The
ErrorMessage contains more information regarding the error which occurred.Accessing the tokens
On successful login, the login result contains the ID Token and Access Token in theIdentityToken
and AccessToken properties respectively.Obtaining the User Information
On successful login, the login result contains the user information in theUser property, which is a
ClaimsPrincipal.To obtain information about the user, you can query the claims. You can for example obtain the user’s name and
email address from the name and email claims:The exact claims returned depends on the scopes that were requested. For more information see @scopes.
Claims
collection:6
Logout
To log the user out call the
LogoutAsync method.Next Steps
Excellent work! If you made it this far, you should now have login, logout, and user profile information running in your application.This concludes our quickstart tutorial, but there is so much more to explore. To learn more about what you can do with Auth0, check out:- Auth0 Dashboard - Learn how to configure and manage your Auth0 tenant and applications
- auth0-oidc-client-net SDK - Explore the SDK used in this tutorial more fully
- Auth0 Marketplace - Discover integrations you can enable to extend Auth0’s functionality