


Device Authorization Flow
This tutorial demonstrates how to call your API from an input-constrained device using the Device Authorization Flow. We recommend that you log in to
follow this quickstart with examples configured for your account.For an interactive experience, you can use the Device Flow Playground.
1
Prerequisites
- Register a Native Application.
- Ensure the OIDC Conformant toggle is enabled. For more information, read OIDC-Conformant Authentication.
- Add Device Code to the Application’s grant types. For more information, read Update Grant Types.
- Add Refresh Token to the Application’s grant types if you want to enable Refresh Tokens.
- Configure and enable at least one connection for the application.
- Register your API with Auth0.
- Enable Allow Offline Access if you are using refresh tokens. For more information, read API Settings.
- Configure Device User Code Settings to define the character set, format, and length of your randomly-generated user code.
2
Request device code
When the user starts the device application and wants to authorize it, your application must request a device
code from the Auth0 Authentication API to associate with the user session.To get the device code, your application must call the Authentication API Device Authorization Flow Authorize endpoint:
3
Receive device code
The device application should receive an HTTP 200 response and a payload similar to this:
4
Request device activation
After your device application receives the 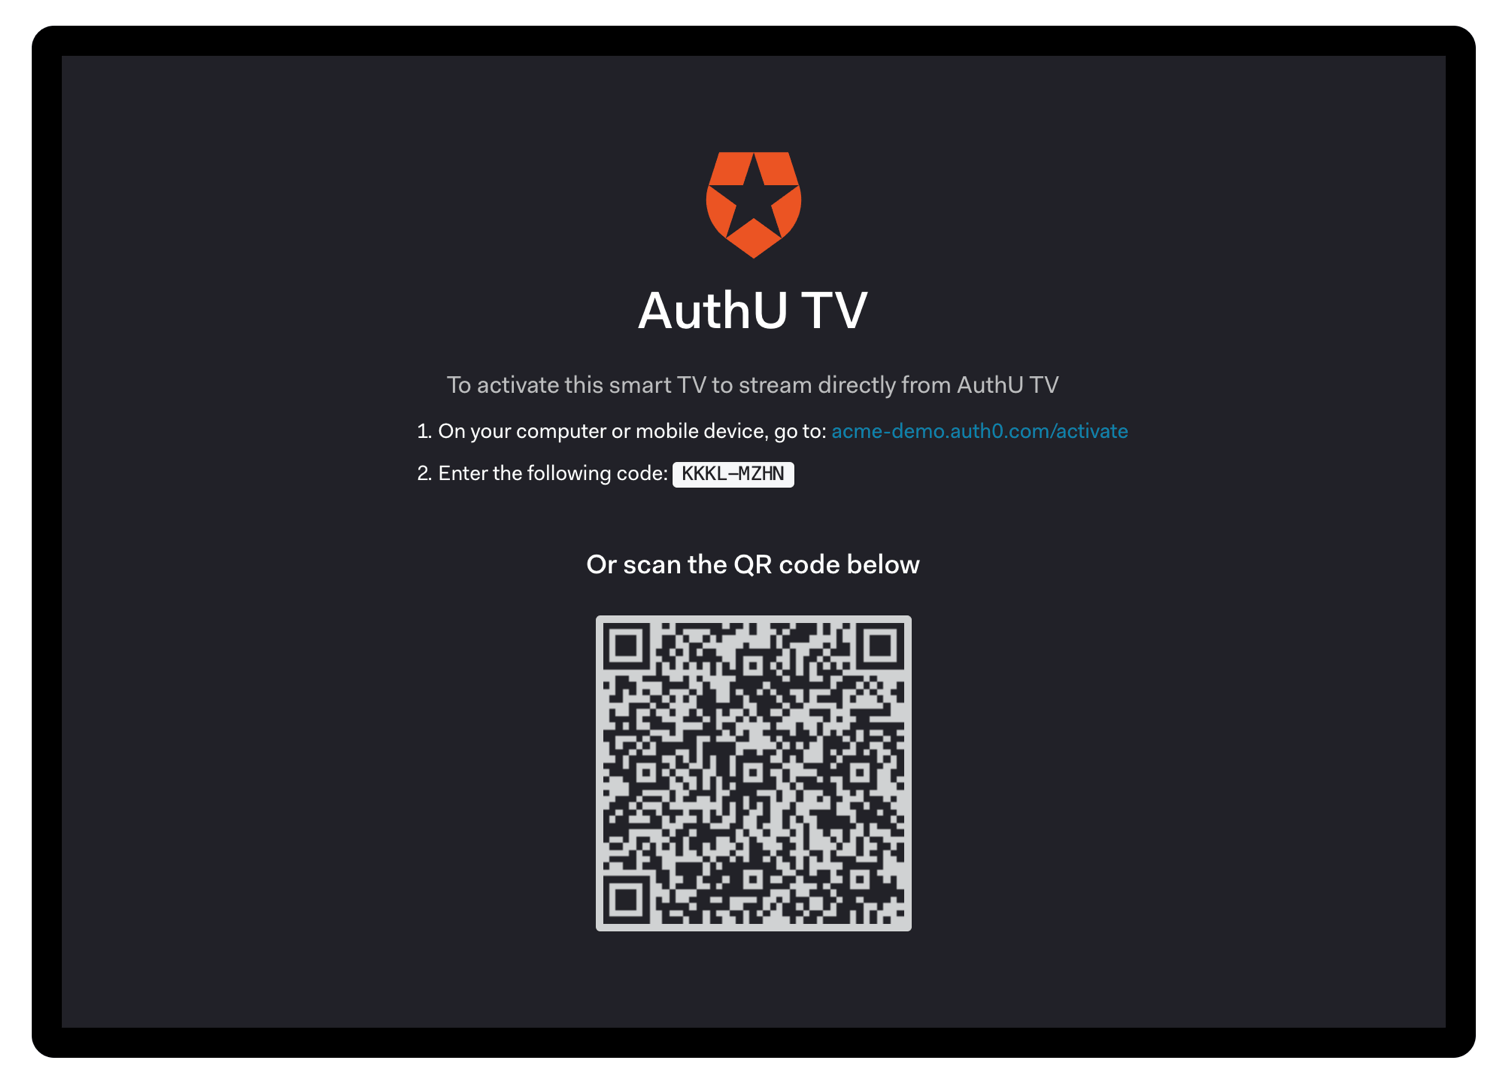
device_code and the user_code, it should
instruct the user to go to the verification_uri and enter the user_code.The
device_code is not intended for the user directly and should not be displayed during
the interaction to avoid confusing the user.When building a CLI, you could skip this step and immediately open the browser with
verification_uri_complete.5
Poll the token endpoint
While your device application waits for the user to activate it, it should call the Authentication API POST /oauth/token endpoint intermittently
and handle the response appropriately.
Ensure your device application waits for the length of the
interval (in seconds) or until
it receives a successful response, whichever is longer, to avoid network latency issues.6
User authorization
The user will either scan the QR code, or else will open the activation page and enter the user code: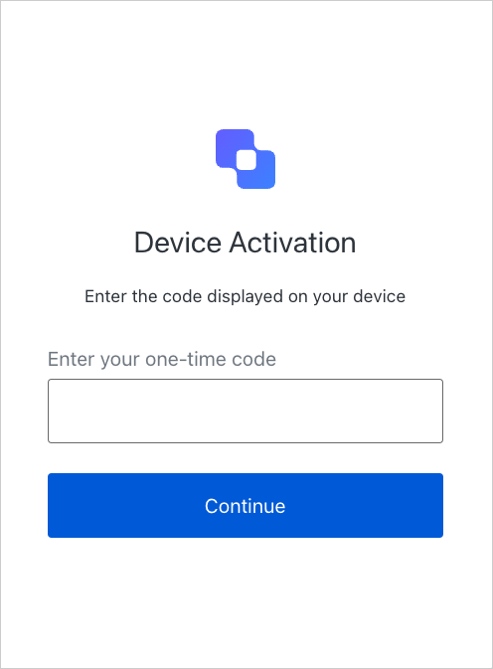 A confirmation page will be shown to have the user confirm that this is the right device:
 The user will complete the transaction by signing in. This step may include one or more of the following
processes:
The user will complete the transaction by signing in. This step may include one or more of the following
processes: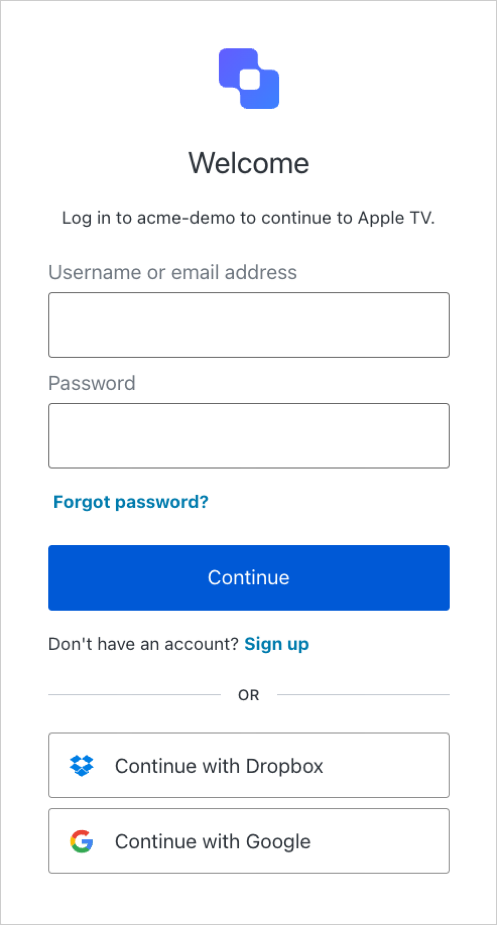 Upon successful authentication and consent, the confirmation prompt will be shown:
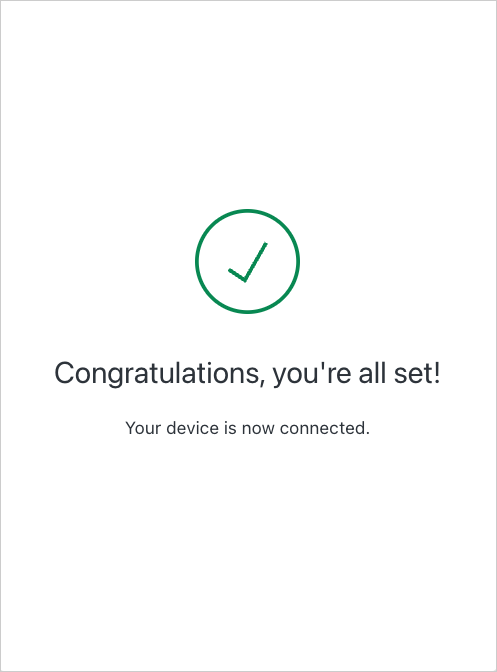 At this point, the user has authenticated and the device has been authorized.
- Authenticating the user
- Redirecting the user to an Identity Provider to handle authentication
- Checking for active SSO sessions
- Obtaining user consent for the device, unless consent has been previously given
7
Receive tokens
After the user authorizes the device application, it receives an HTTP 200 response and the following payload:Access tokens are used to call the Authentication API Get User Info endpoint (if your device
application requested the
You should validate your tokens before saving them. To learn how, read Validate Access Tokens and Validate ID Tokens.
openid scope) or the API that was specified by the audience
parameter. If you are calling your own API, your device application must verify the access token before using it.ID tokens contain user information that must be decoded and extracted. The Authentication API
only returns an id_token if your device application requested the openid scope.Refresh tokens are used to obtain a new access token or
ID token after the previous one has expired. The Authentication API only returns a refresh_token if
the Allow Offline Access setting is enabled for the API specified by the audience parameter,
and your device application requested the offline_access scope.8
Call your API
To call your API, your device application must pass the access token as a Bearer token in the
Authorization header of your HTTP request.9
Refresh tokens
To get a new access token for a user, your device application can call the Authentication API POST /oauth/token endpoint with the
If the request was successful, your device application receives an HTTP 200 response with the following payload:To learn more about refresh tokens, read Refresh Tokens.
refresh_token parameter.10
Troubleshooting
Tenant logs are created for any interaction that takes
place and can be used to troubleshoot issues.This can occur for a variety of reasons, including:
Token responses
While you wait for the user to authorize the device, you may receive a few different HTTP 4xx responses.Authorization pending
You will see this error while waiting for the user to take action. Continue polling using the suggestedinterval retrieved in the previous step of this tutorial.Slow down
You are polling too fast. Slow down and use the suggested interval retrieved in the previous step of this tutorial. To avoid receiving this error due to network latency, you should start counting each interval after receipt of the last polling request’s response.Expired token
The user has not authorized the device quickly enough, so thedevice_code has expired. Your
application should notify the user that the flow has expired and prompt them to reinitiate the flow.The
expired_token error is returned exactly once. After that, the endpoint returns the
invalid_grant error.Access Denied
If access is denied, you receive:- The user refused to authorize the device.
- The authorization server denied the transaction.
- A configured Action denied access.
11
Sample implementations
Refer to the samples below to learn how to implement this flow in real-world applications.
- Device Authorization Playground
- AppleTV (Swift): Simple application that shows how Auth0 can be used with the Device Authorization Flow from an AppleTV.
- CLI (Node.js): Sample implementation of a CLI that uses the Device Authorization Flow instead of the Authorization Code Flow. The major difference is that your CLI does not need to host a webserver and listen on a port.
12
Limitations
To use the Device Authorization Flow, a device application must:
- Support Server Name Indication (SNI)
- Be a Native Application
- Have the Authentication Method set to None
- Be OIDC-conformant
- Not be created through Dynamic Client Registration
- Social Connections using Auth0 developer keys unless you are using New Universal Login Experience
- Query string parameters to be accessed from a hosted login page or Actions.
Next Steps
Excellent work! If you made it this far, you should now have login, logout, and user profile information running in your application.This concludes our quickstart tutorial, but there is so much more to explore. To learn more about what you can do with Auth0, check out:- Auth0 Dashboard - Learn how to configure and manage your Auth0 tenant and applications
- Auth0 Marketplace - Discover integrations you can enable to extend Auth0’s functionality