Customize Universal Login Page Templates
You can customize pages by providing a page template created with the Liquid template language. With page templates, you can define the content displayed around Universal Login prompts, such as the login box or an challenge. As the same page template is used for all login flow pages, this method of customization allows you to easily implement a consistent, branded experience for users.
To use customized page templates, you must configure a Custom Domain for your tenant. Further, you can only update Universal Login page templates with the Management API.
To center the prompt on the page, add


Custom query parameters have the following limitations:
To learn more, review Customize Signup and Login Prompts.

 To retrieve the template, you need to use the following endpoint:
To delete the template, you need to use the following endpoint:
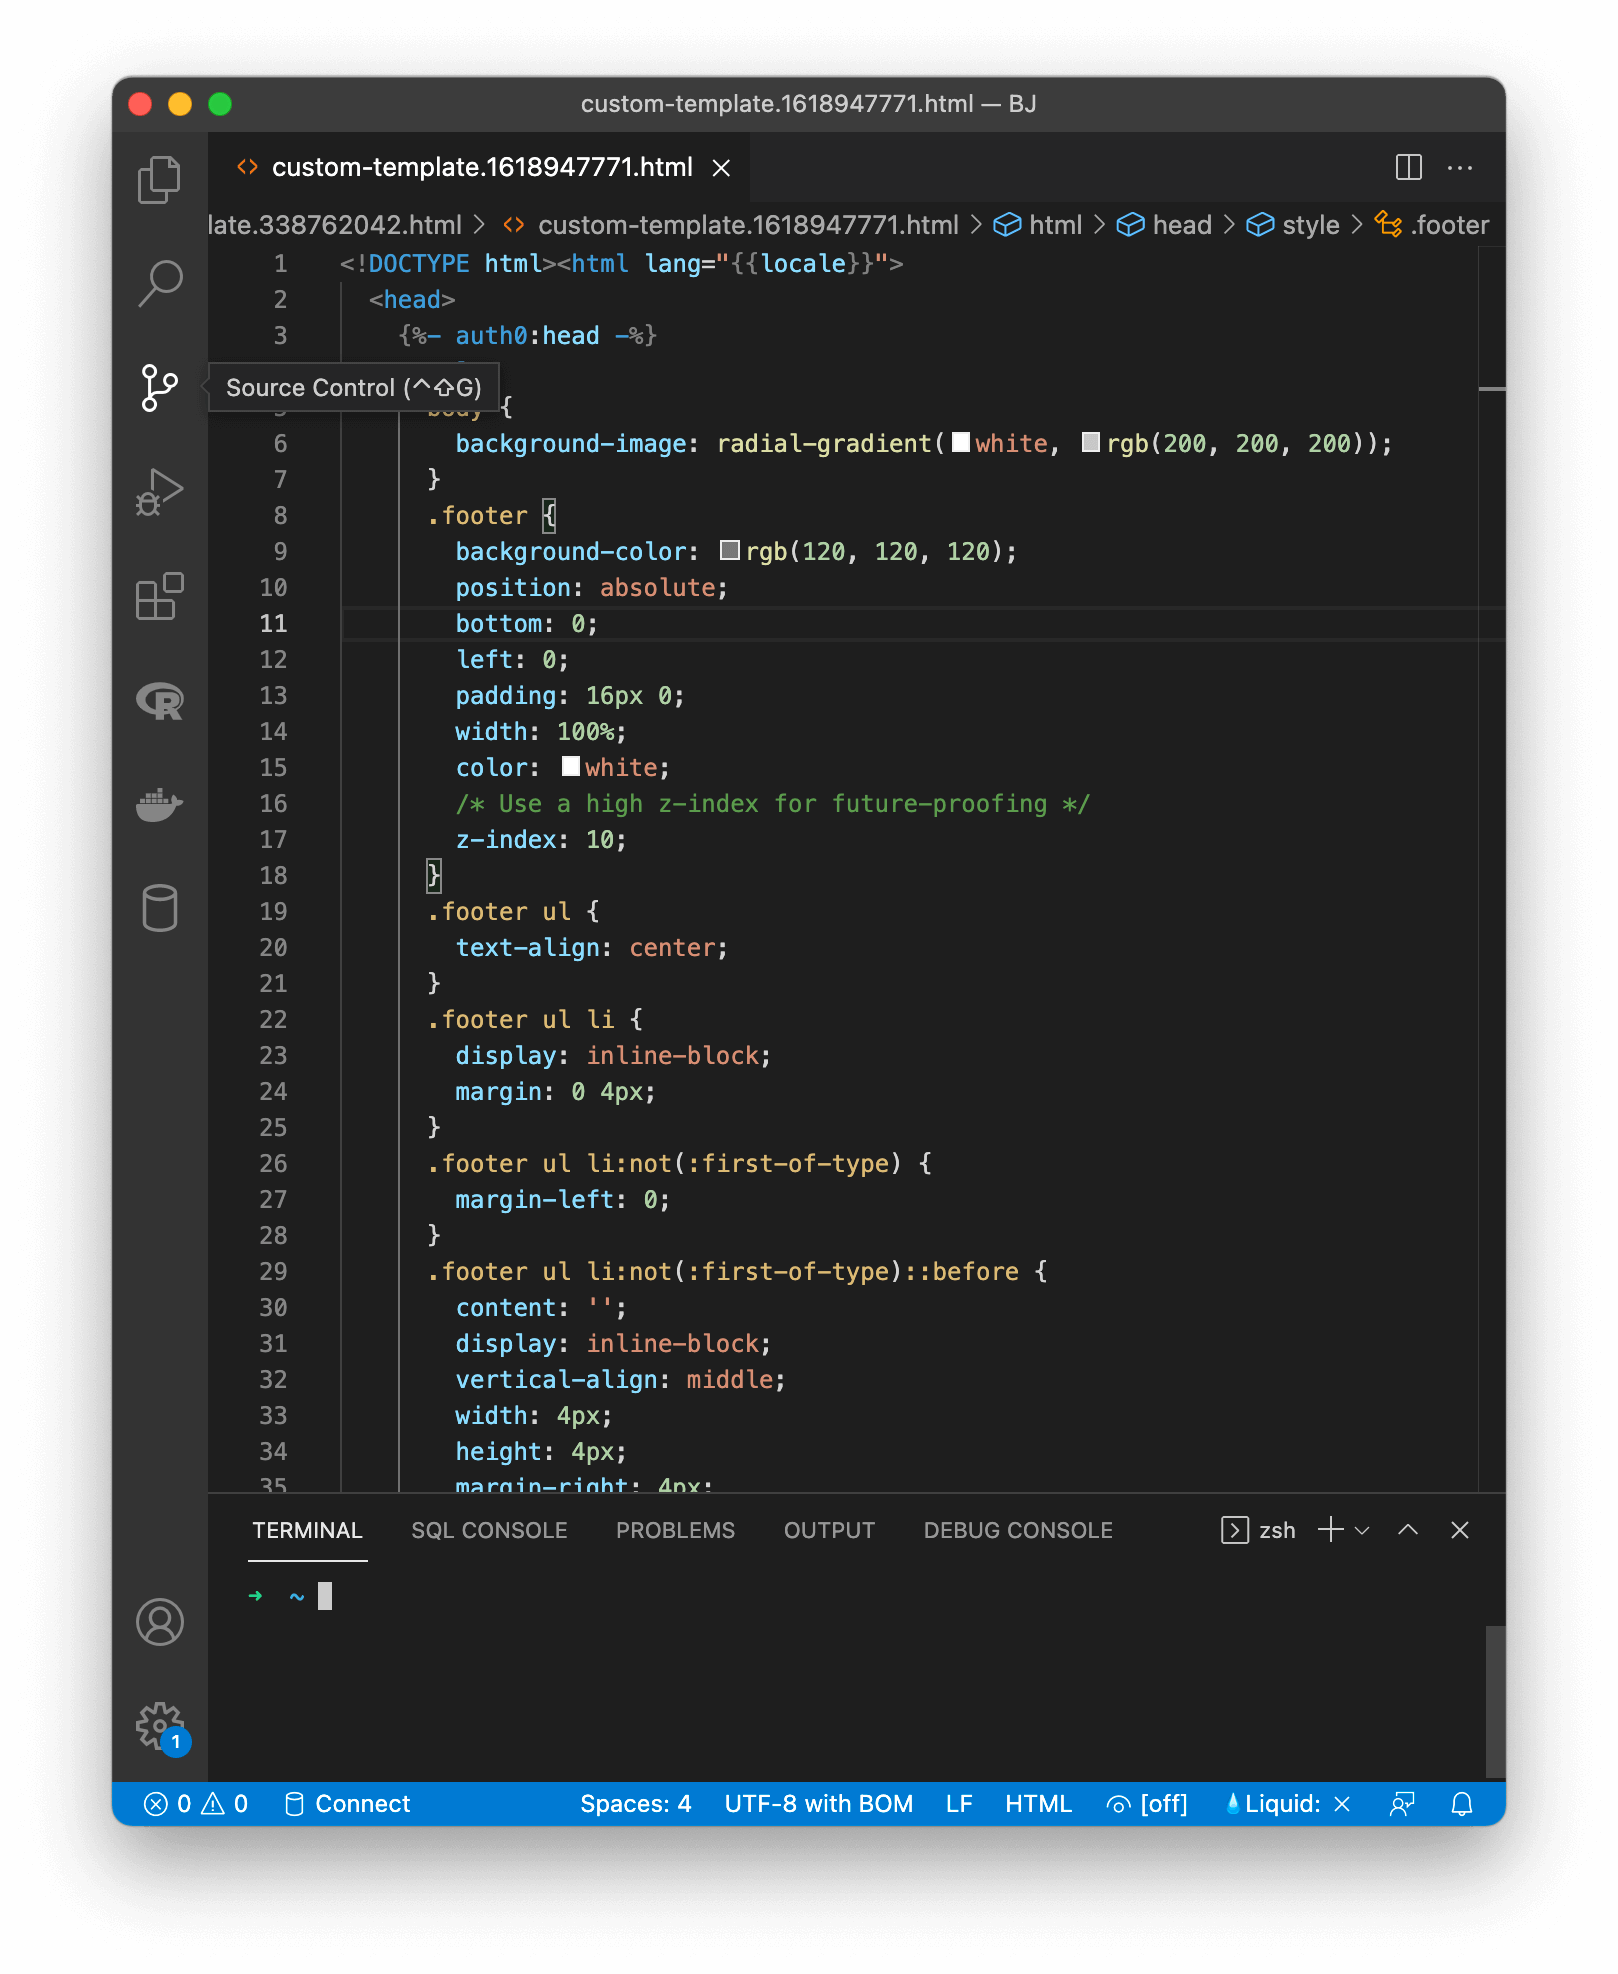
The maximum size for the Page Template is 100KB. If that is not big enough, consider moving images/css files outside of the Page Template code.
There are a few things that you can customize using CSS:
The current implementation does not support further CSS customization. If you look at the HTML that is generated, you will see code like:
To retrieve the template, you need to use the following endpoint:
To delete the template, you need to use the following endpoint:
The maximum size for the Page Template is 100KB. If that is not big enough, consider moving images/css files outside of the Page Template code.
There are a few things that you can customize using CSS:
The current implementation does not support further CSS customization. If you look at the HTML that is generated, you will see code like:
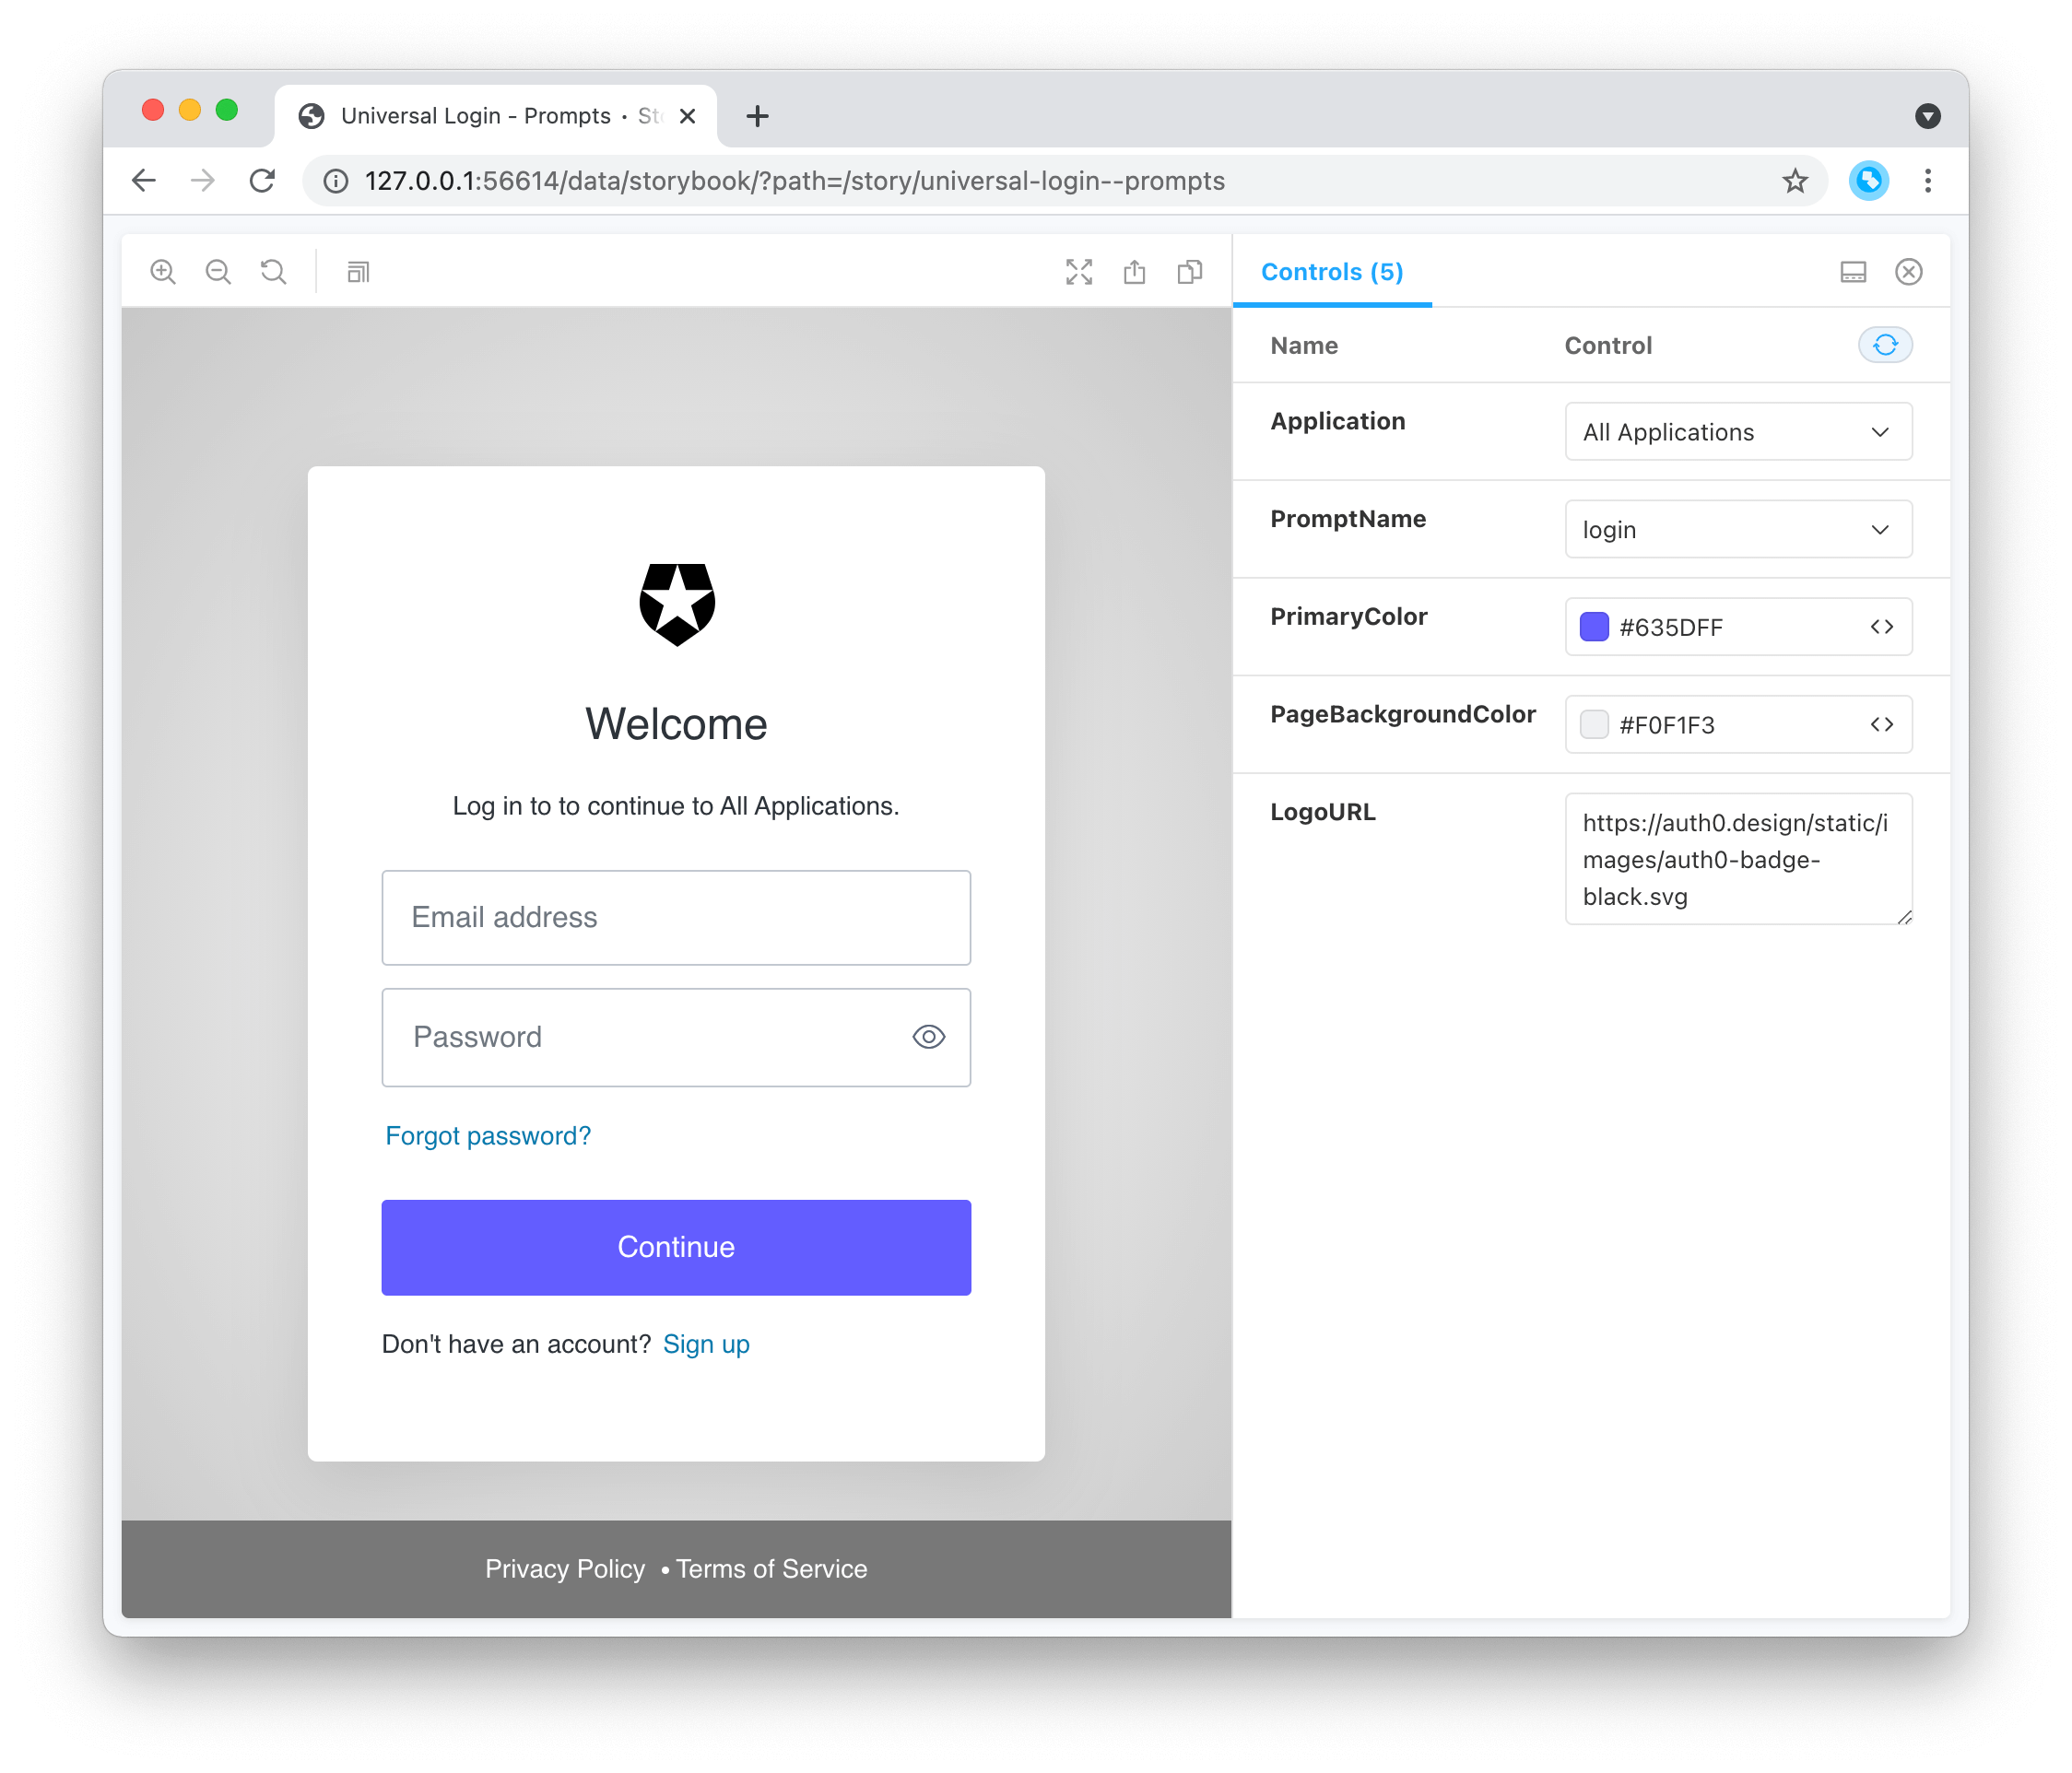
 You can now change the page template code, and you will be able to preview the changes in your browser window.
Once you close the window, you’ll be asked if you want to save the template. If you answer Yes, the template will be uploaded to your tenant.
You can now change the page template code, and you will be able to preview the changes in your browser window.
Once you close the window, you’ll be asked if you want to save the template. If you answer Yes, the template will be uploaded to your tenant.
The term
prompt refers to a specific step of the login flow, such as the sign-up page or an MFA challenge. The variables and code samples on this page may use the term prompt or the term widget. While these terms are synonymous in the context of Universal Login, they are not interchangeable within your code. To ensure successful customization, verify you are using the appropriate term listed for any elements you add to your code.Page template requirements
When creating a Universal Login page template, you must include the following tags:| Tag | Description |
|---|---|
auth0:widget | Contains HTML for the prompt displayed on every page of the login flow, such as the Login page or Reset Password page |
auth0:head | Contains the tags required for rendering the prompt |
class="_widget-auto-layout" to the <body> element. You can omit this attribute to manually position the prompt as needed.
Page template limitations:
- CSS class names change each time Auth0 builds the project. Custom CSS that targets these classes will break with each new build.
- The HTML structure of Universal Login pages is subject to change. Avoid customizations that rely on the HTML structure to prevent any interruptions.
Example template:
The following example demonstrates the simplest Universal Login page template you can create with the required tags:If you use Storybook to view your template, be aware that the
<script> tag breaks the rendering as it cannot parse these tags correctly. As a workaround, use backticks (`) and plus sign (+) characters to properly inject the <script> tag into your template code.Example:<scr`+`ipt>console.log("test");</scr`+`ipt>Page template variables
Page templates support a variety of context variables that impact how a page is rendered. For example, you can use these variables to:- Render different content depending on the application associated with the login flow. For example, you may manage two brands that require different page designs.
- Render different content depending on the specific prompt. For example, you may want to add information about what your application offers on the Login page but prefer the MFA flow to only display the MFA challenge prompt.
- Add a footer with user support information, such as links to your support page or contact information.
Available variables
Page templates support the following variables:Application
| Variable | Description | Example |
|---|---|---|
application.id | Your application client ID | XXXXXXXXXXXXXXXXXXXXXXXXX |
application.name | The name of your application | My Application |
application.logo_url | URL of the application logo | https://example.com/mylogo.png |
application.metadata | Your application metadata |
Branding
| Variable | Description | Example |
|---|---|---|
branding.logo_url | URL of your application logo | https://example.com/mylogo.png |
branding.colors.primary | Your primary branding color | #000000 |
branding.colors.page_background | Background color for Universal Login pages | #FFFFFF |
Tenant
| Variable | Description | Example |
|---|---|---|
tenant.friendly_name | Your tenant’s display name | My Tenant |
tenant.support_email | Support email address for your tenant | support@example.com |
tenant.support_url | Support page URL for your tenant | https://example.com/support |
tenant.enabled_locales | Comma-separated list of locales enabled for your tenant | en, es |
Organizations
The following variables refer to the Auth0 Organizations feature.| Variable | Description | Example |
|---|---|---|
organization.id | ID of Organization | org_XXXXXXXXXXXXXXX |
organization.display_name | Display name of Organization | My Organization |
organization.name | Internal name of Organization | my-organization |
organization.metadata | Organization metadata | |
organization.branding.logo_url | URL of Organization logo | https://example.com/orglogo.png |
organization.branding.colors.primary | Primary branding color for Organization | #000000 |
organization.branding.colors.page_background | Background color for Organization’s login pages | #FFFFFF |
Current user information
You can only use the following variables for pages that render after authentication.| Variables | Description | Example |
|---|---|---|
user.user_id | ID of the user profile | auth0|XXXXXXXXXXXXXXXXXXXX |
user.picture | URL of the user’s profile picture | https://example.com/userimage |
user.email | Email address of user | user@example.com |
user.email_verified | Boolean of email verification status (true/false) | true |
user.app_metadata | app_metadata object of the user profile | |
user.user_metadata | user_metadata object of the user profile | |
user.family_name | Family (last) name of user | Smith |
user.given_name | Given (first) name of user | Abigail |
user.name | Full name of user | Abigail Smith |
user.nickname | Nickname (alias) of user | Abby |
user.username | Internal name of user | asmith |
Current screen information
| Variables | Description | Example |
|---|---|---|
dir | Indicates the direction of the element’s text. | auto, rtl, ltr |
locale | Locale used to render the page; matches one of the supported tenant languages | en-US |
prompt.name | Name of the currently rendered Universal Login prompt | mfa |
prompt.screen.name | Name of the currently rendered Universal Login screen | mfa-login-options |
prompt.screen.texts | All localized texts from the current screen | |
state | Renders the current page’s state value, which is opaque and used for security purposes. |
Prompts
The termprompt refers to a specific step of the login flow. A specific prompt may consist of one or more screens. You can manage prompts through the Auth0 Dashboard or the prompts endpoints of the Management API.
The sections below provide details for each available prompt.
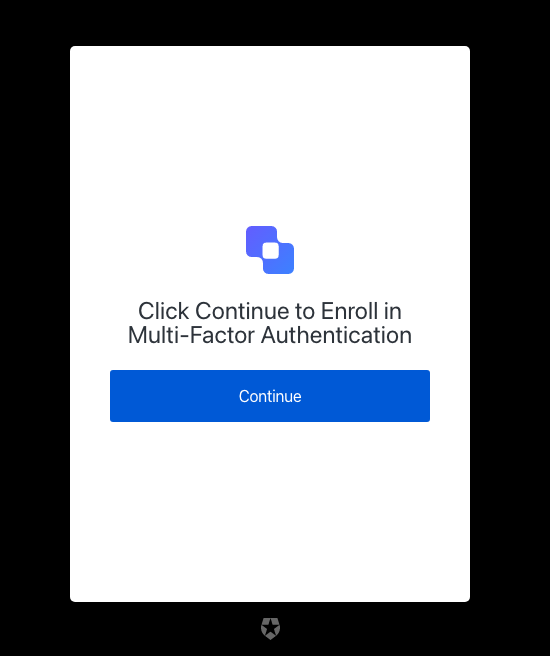
common
common
Screen: redeem-ticket
| Text | Key |
|---|---|
| Loading… | pageTitle |
| Javascript is not enabled on your browser, please click button to continue. | description |
| Continue | buttonText |
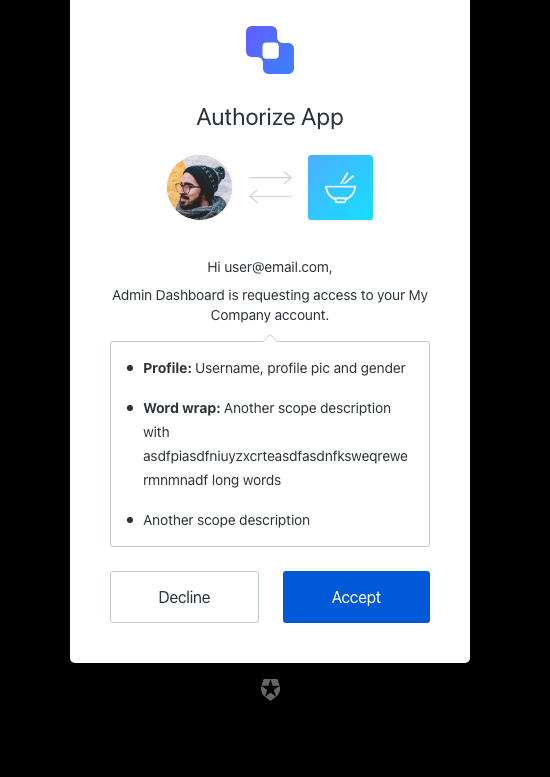
consent
consent
Screen: consent
| Text | Key |
|---|---|
| Authorize $ | pageTitle |
| Authorize App | title |
| Hi $, | pickerTitle |
| Tenant and Audience selector | audiencePickerAltText |
| ${clientName} is requesting access to your account. | messageMultipleTenants |
| \{clientName} is requesting access to your account. | messageSingleTenant |
| Accept | acceptButtonText |
| Decline | declineButtonText |
| ${companyName} | logoAltText |
| Invalid action | invalid-action |
| Audience is required | invalid-audience |
| Invalid scope, must be an array | invalid-scope |
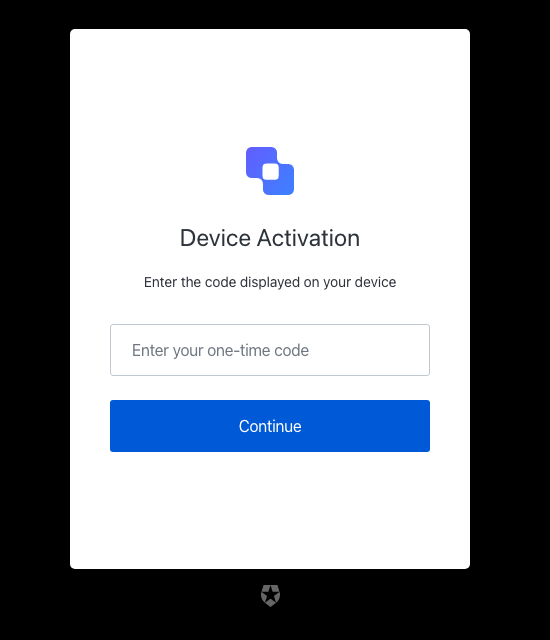
device-flow
device-flow
Screen: device-code-activation
| Text | Key |
|---|---|
| Enter your device code to log in $ | pageTitle |
| Continue | buttonText |
| Enter the code displayed on your device | description |
| Enter your one-time code | placeholder |
| Device Activation | title |
| ${companyName} | logoAltText |
| Invalid or expired user code | invalid-expired-code |
| Please enter the code displayed on your device | no-code |
| The code you entered is invalid | invalid-code |
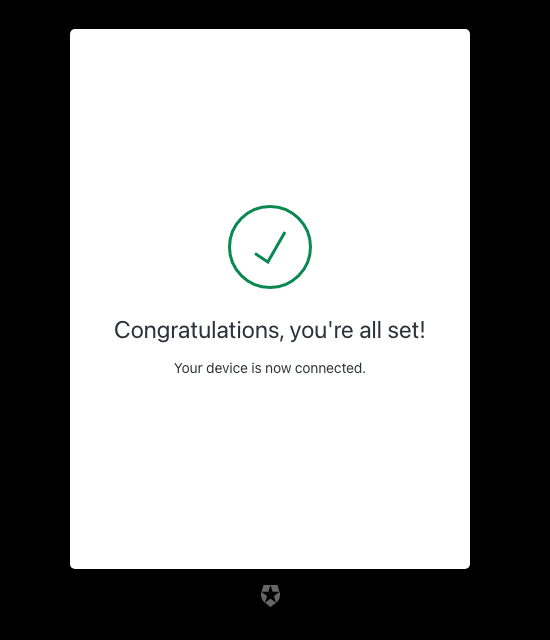
Screen: device-code-activation-allowed
| Text | Key |
|---|---|
| Login successful $ | pageTitle |
| Your device is now connected. | description |
| Congratulations, you’re all set! | eventTitle |
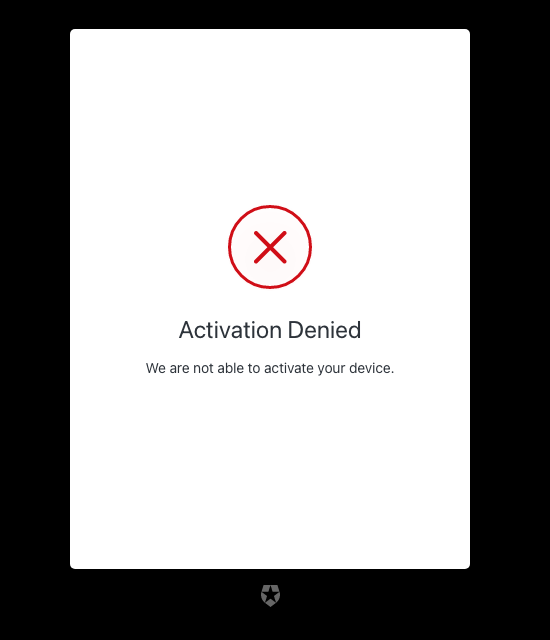
Screen: device-code-activation-denied
| Text | Key |
|---|---|
| Login error $ | pageTitle |
| We are not able to activate your device. | description |
| Activation Denied | eventTitle |
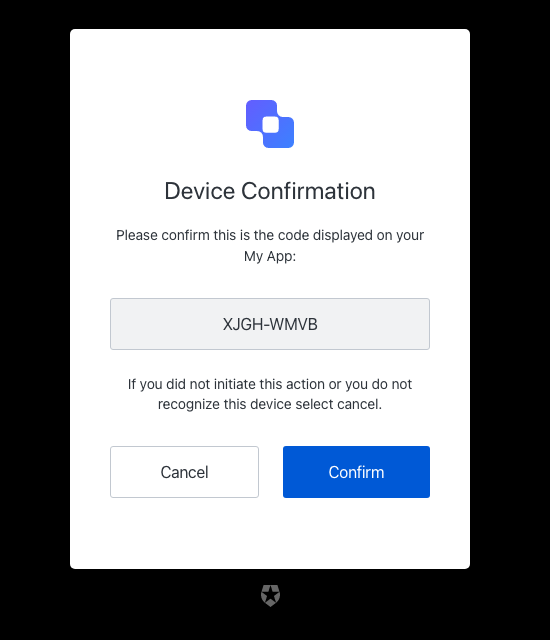
Screen: device-code-confirmation
| Text | Key |
|---|---|
| Confirm your device code to log in $ | pageTitle |
| Please confirm this is the code displayed on your $: | description |
| Secure code | inputCodeLabel |
| Device Confirmation | title |
| Confirm | confirmButtonText |
| Cancel | cancelButtonText |
| If you did not initiate this action or you do not recognize this device select cancel. | confirmationText |
| ${companyName} | logoAltText |
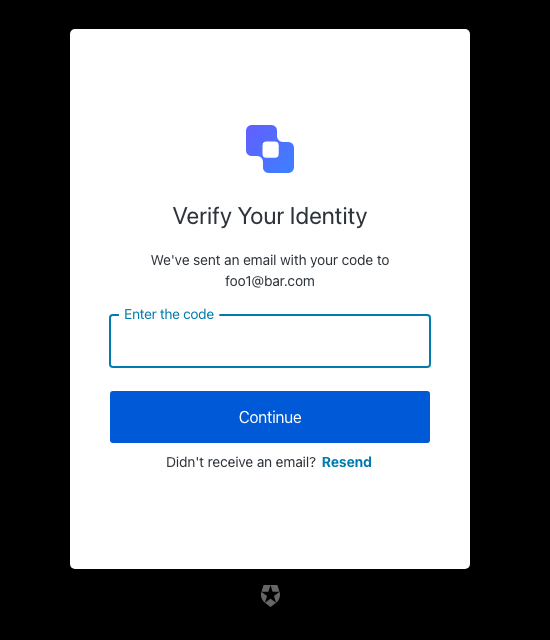
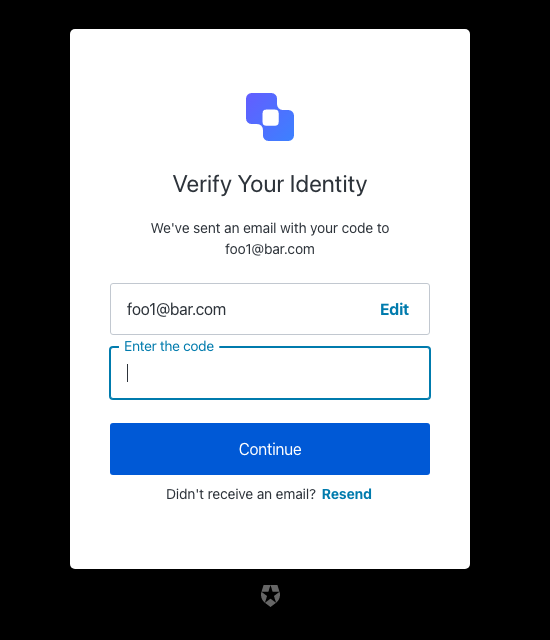
email-otp-challenge
email-otp-challenge
Screen: email-otp-challenge
| Text | Key |
|---|---|
| Enter your email code to log in $ | pageTitle |
| Continue | buttonText |
| We’ve sent an email with your code to $ | description |
| Enter the code | placeholder |
| Resend | resendActionText |
| Didn’t receive an email? | resendText |
| Verify Your Identity | title |
| ${companyName} | logoAltText |
| OTP Code must have 6 numeric characters | invalid-otp-code-format |
| The code you entered is invalid | invalid-code |
| We couldn’t verify the code. Please try again later. | authenticator-error |
| You have exceeded the amount of emails. Wait a few minutes and try again. | too-many-email |
| Please enter a code | no-code |
email-verification
email-verification
Screen: email-verification-result
| Text | Key |
|---|---|
| Email verification status $ | pageTitle |
| Email Verified | verifiedTitle |
| Error | errorTitle |
| Your email address was successfully verified. | verifiedDescription |
| This account is already verified. | alreadyVerifiedDescription |
| User account does not exist or the verification code is invalid. | invalidAccountOrCodeDescription |
| Your email address could not be verified. | unknownErrorDescription |
| Back to $ | buttonText |
| This ticket was expired. | auth0-users-expired-ticket |
| Something went wrong, please try again later. | custom-script-error-code |
| This ticket was already used. | auth0-users-used-ticket |
| Something went wrong, please try again later | auth0-users-validation |
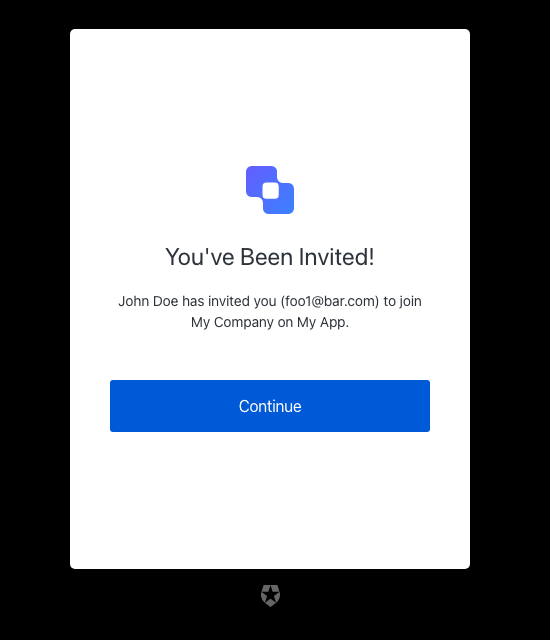
invitation
invitation
Screen: accept-invitation
| Text | Key |
|---|---|
| Accept your invitation to sign up $ | pageTitle |
| You’ve Been Invited! | title |
| \{inviterName} has invited you () to join . | description |
| Continue | buttonText |
| ${companyName} | logoAltText |
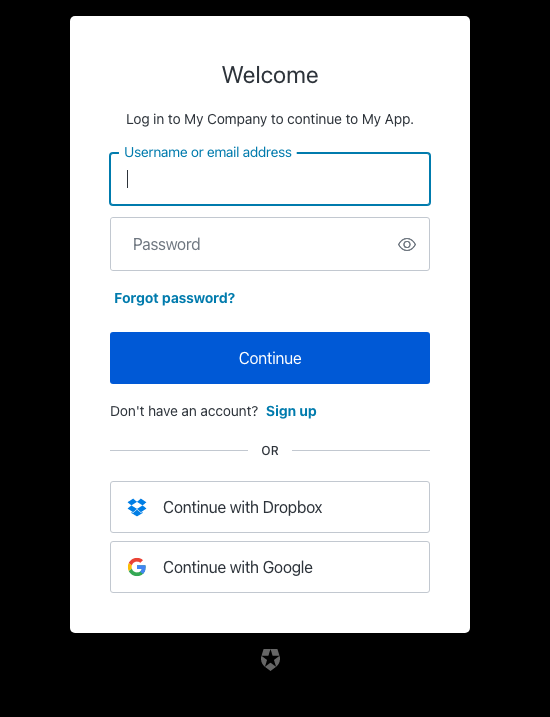
login
login
Screen: login
| Text | Key |
|---|---|
| Log in | <%= ”$” %> |
| Welcome | title |
| Log in to <%= "" %>. | description |
| Or | separatorText |
| Continue | buttonText |
| Continue with <%= "" %> | federatedConnectionButtonText |
| Sign up | signupActionLinkText |
| Don’t have an account? | signupActionText |
| Forgot password? | forgotPasswordText |
| Password | passwordPlaceholder |
| Username or email address | usernamePlaceholder |
| Email address | emailPlaceholder |
| Phone number | phonePlaceholder |
| Username | usernameOnlyPlaceholder |
| Phone or Username or Email | phoneOrUsernameOrEmailPlaceholder |
| Phone number or Email address | phoneOrEmailPlaceholder |
| Phone Number or Username | phoneOrUsernamePlaceholder |
| Username or Email address | usernameOrEmailPlaceholder |
| Edit | editEmailText |
| Alerts | alertListTitle |
| You’ve Been Invited! | invitationTitle |
| Log in to accept <%= "" %> on <%= ”$” %>. | invitationDescription |
| <%= ”$” %> | logoAltText |
| Show password | showPasswordText |
| Hide password | hidePasswordText |
| Wrong username or password | wrong-credentials |
| Wrong email or password | wrong-email-credentials |
| Incorrect username or password | wrong-username-credentials |
| Incorrect phone number or password | wrong-phone-credentials |
| Incorrect email address, username, or password | wrong-email-username-credentials |
| Incorrect email address, phone number, username, or password. Phone numbers must include the country code. | wrong-email-phone-username-credentials |
| Incorrect email address, phone number, or password. Phone numbers must include the country code. | wrong-email-phone-credentials |
| Incorrect phone number, username or password. Phone numbers must include the country code. | wrong-phone-username-credentials |
| The code you entered is invalid | invalid-code |
| Invalid or expired user code | invalid-expired-code |
| Something went wrong, please try again later. | custom-script-error-code |
| Something went wrong, please try again later | auth0-users-validation |
| We are sorry, something went wrong when attempting to log in | authentication-failure |
| Invalid connection | invalid-connection |
| We have detected suspicious login behavior and further attempts will be blocked. Please contact the administrator. | ip-blocked |
| Invalid connection | no-db-connection |
| We have detected a potential security issue with this account. To protect your account, we have prevented this login. Please reset your password to proceed. | password-breached |
| Your account has been blocked after multiple consecutive login attempts. | user-blocked |
| Too many login attempts for this user. Please wait, and try again later. | same-user-login |
| Please enter an email address | no-email |
| Password is required | no-password |
| Username is required | no-username |
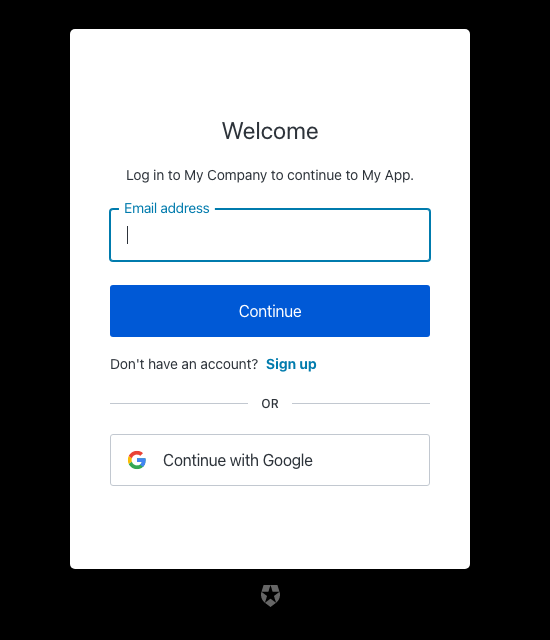
login-id
login-id
Screen: login-id
| Text | Key |
|---|---|
| Log in | <%= ”$” %> |
| Welcome | title |
| Log in to <%= "" %>. | description |
| Or | separatorText |
| Continue | buttonText |
| Continue with <%= "" %> | federatedConnectionButtonText |
| Can’t log in to your account? | forgotPasswordText |
| Sign up | signupActionLinkText |
| Don’t have an account? | signupActionText |
| Password | passwordPlaceholder |
| Username or email address | usernamePlaceholder |
| Email address | emailPlaceholder |
| Phone number | phonePlaceholder |
| Username | usernameOnlyPlaceholder |
| Phone or Username or Email | phoneOrUsernameOrEmailPlaceholder |
| Phone number or Email address | phoneOrEmailPlaceholder |
| Phone Number or Username | phoneOrUsernamePlaceholder |
| Username or Email address | usernameOrEmailPlaceholder |
| Edit | editEmailText |
| Alerts | alertListTitle |
| <%= ”$” %> | logoAltText |
| Continue with a passkey | passkeyButtonText |
| Wrong username or password | wrong-credentials |
| Wrong email or password | wrong-email-credentials |
| Incorrect username or password | wrong-username-credentials |
| Incorrect phone number or password | wrong-phone-credentials |
| Incorrect email address, username, or password | wrong-email-username-credentials |
| Incorrect email address, phone number, username, or password. Phone numbers must include the country code. | wrong-email-phone-username-credentials |
| Incorrect email address, phone number, or password. Phone numbers must include the country code. | wrong-email-phone-credentials |
| Incorrect phone number, username or password. Phone numbers must include the country code. | wrong-phone-username-credentials |
| The code you entered is invalid | invalid-code |
| Invalid or expired user code | invalid-expired-code |
| Username can only contain alphanumeric characters or: ’<%= "" %> and <%= ”$” %> characters. | invalid-username |
| Invalid Login ID entered | invalid-login-id |
| Enter a valid email address or phone number. Phone numbers must include the country code. | invalid-email-phone |
| Enter a valid email address or username | invalid-email-username |
| Enter a valid phone number or username. Phone numbers must include the country code. | invalid-phone-username |
| Enter a valid email address, phone number, or username. Phone numbers must include the country code. | invalid-email-phone-username |
| Something went wrong, please try again later. | custom-script-error-code |
| Something went wrong, please try again later | auth0-users-validation |
| We are sorry, something went wrong when attempting to log in | authentication-failure |
| Invalid connection | invalid-connection |
| We have detected suspicious login behavior and further attempts will be blocked. Please contact the administrator. | ip-blocked |
| Invalid connection | no-db-connection |
| Email does not match any enterprise directory | no-hrd-connection |
| We have detected a potential security issue with this account. To protect your account, we have prevented this login. Please reset your password to proceed. | password-breached |
| Your account has been blocked after multiple consecutive login attempts. | user-blocked |
| Too many login attempts for this user. Please wait, and try again later. | same-user-login |
| Please enter an email address | no-email |
| Password is required | no-password |
| Username is required | no-username |
| Enter a valid phone number | invalid-phone-number |
| Password and passkey are not allowed | conflict-password-passkey |
| Password is not allowed | password-not-allowed |
| Passkey is not allowed | passkey-not-allowed |
| Please select a passkey | no-passkey |
| Passkey authentication failed | passkey-authentication-failed |
| Something went wrong. Please try again later. | invalid-passkey |
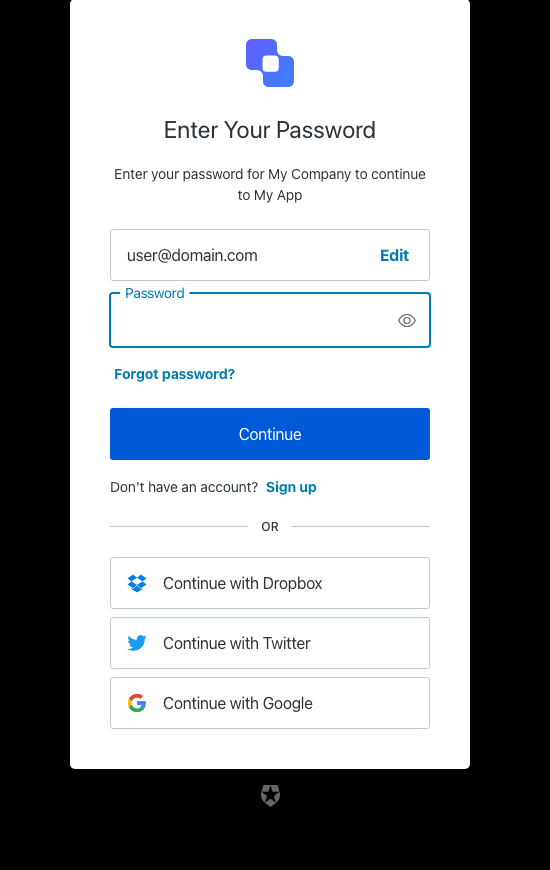
login-password
login-password
Screen: login-password
| Text | Key |
|---|---|
| Enter your password to log in | <%= ”$” %> |
| Enter Your Password | title |
| Enter your password for <%= "" %> | description |
| Or | separatorText |
| Continue | buttonText |
| Continue with <%= "" %> | federatedConnectionButtonText |
| Sign up | signupActionLinkText |
| Don’t have an account? | signupActionText |
| Forgot password? | forgotPasswordText |
| Password | passwordPlaceholder |
| Username or email address | usernamePlaceholder |
| Email address | emailPlaceholder |
| Edit | editEmailText |
| Edit email address | editLinkScreenReadableText |
| Alerts | alertListTitle |
| You’ve Been Invited! | invitationTitle |
| Log in to accept <%= "" %> on <%= ”$” %>. | invitationDescription |
| <%= ”$” %> | logoAltText |
| Use Fingerprint or Face Recognition | useBiometricsText |
| Show password | showPasswordText |
| Hide password | hidePasswordText |
| Wrong username or password | wrong-credentials |
| The code you entered is invalid | invalid-code |
| Invalid or expired user code | invalid-expired-code |
| Wrong email or password | wrong-email-credentials |
| Incorrect username or password | wrong-username-credentials |
| Incorrect phone number or password | wrong-phone-credentials |
| Incorrect email address, username, or password | wrong-email-username-credentials |
| Incorrect email address, phone number, username, or password. Phone numbers must include the country code. | wrong-email-phone-username-credentials |
| Incorrect email address, phone number, or password. Phone numbers must include the country code. | wrong-email-phone-credentials |
| Incorrect phone number, username or password. Phone numbers must include the country code. | wrong-phone-username-credentials |
| Something went wrong, please try again later. | custom-script-error-code |
| Something went wrong, please try again later | auth0-users-validation |
| We are sorry, something went wrong when attempting to log in | authentication-failure |
| Invalid connection | invalid-connection |
| We have detected suspicious login behavior and further attempts will be blocked. Please contact the administrator. | ip-blocked |
| Invalid connection | no-db-connection |
| We have detected a potential security issue with this account. To protect your account, we have prevented this login. Please reset your password to proceed. | password-breached |
| Your account has been blocked after multiple consecutive login attempts. | user-blocked |
| Too many login attempts for this user. Please wait, and try again later. | same-user-login |
| Please enter an email address | no-email |
| Password is required | no-password |
| Username is required | no-username |
login-passwordless
login-passwordless
Screen: login-passwordless-email-code
| Text | Key |
|---|---|
| Enter your email code to log in $ | pageTitle |
| Continue | buttonText |
| We’ve sent an email with your code to $ | description |
| Enter the code | placeholder |
| Resend | resendActionText |
| Didn’t receive an email? | resendText |
| Verify Your Identity | title |
| ${companyName} | logoAltText |
| Code is invalid | invalid-verification-code |
| Code could not be sent. Please try again later. | passwordless-authenticator-error |
| Something went wrong. Please try again later. | passwordless-unknown-error |
Screen: login-passwordless-email-link
| Text | Key |
|---|---|
| Email Sign In Link $ | pageTitle |
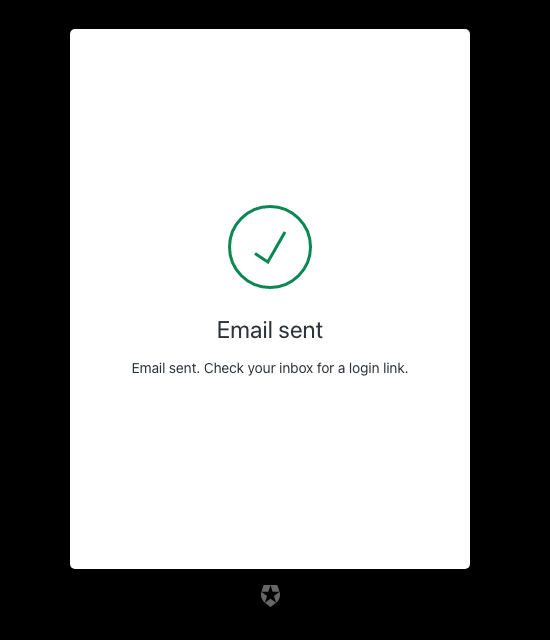
| Email sent | successTitle |
| Something went wrong | errorTitle |
| Email sent. Check your inbox for a login link. | description |
| Please try again later. | unknownErrorDescription |
Screen: login-passwordless-sms-otp
| Text | Key |
|---|---|
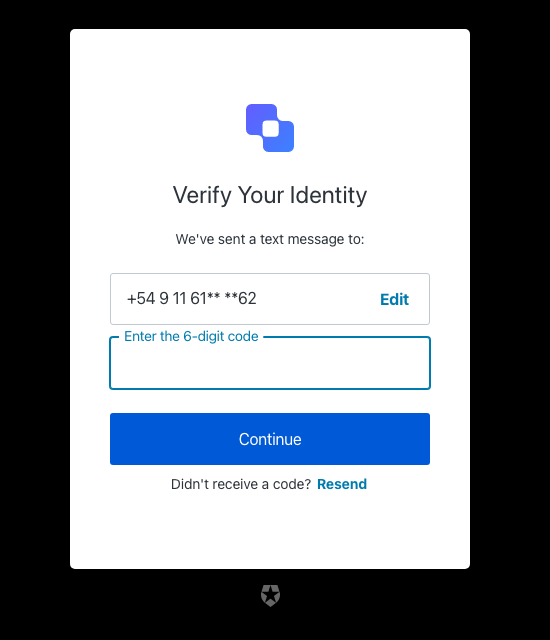
| Enter your phone code to log in $ | pageTitle |
| Verify Your Identity | title |
| We’ve sent a text message to: | description |
| Continue | buttonText |
| Edit | editText |
| Enter the 6-digit code | placeholder |
| Resend | resendActionText |
| Didn’t receive a code? | resendText |
| ${companyName} | logoAltText |
| Code is invalid | invalid-verification-code |
| Code could not be sent. Please try again later. | passwordless-authenticator-error |
| Something went wrong. Please try again later. | passwordless-unknown-error |
login-email-verification
login-email-verification
Screen: login-email-verification
| Text | Key |
|---|---|
| Enter your email code to log in $ | pageTitle |
| Continue | buttonText |
| We’ve sent an email with your code to $ | description |
| Enter the code | placeholder |
| Resend | resendActionText |
| Didn’t receive an email? | resendText |
| Verify Your Email | title |
| ${companyName} | logoAltText |
| OTP Code must have 6 numeric characters | invalid-otp-code-format |
| The code you entered is invalid | invalid-code |
| Invalid or expired user code | invalid-expired-code |
| We couldn’t verify the code. Please try again later. | authenticator-error |
| You have exceeded the amount of emails. Wait a few minutes and try again. | too-many-email |
logout
logout
Screen: logout
| Text | Key |
|---|---|
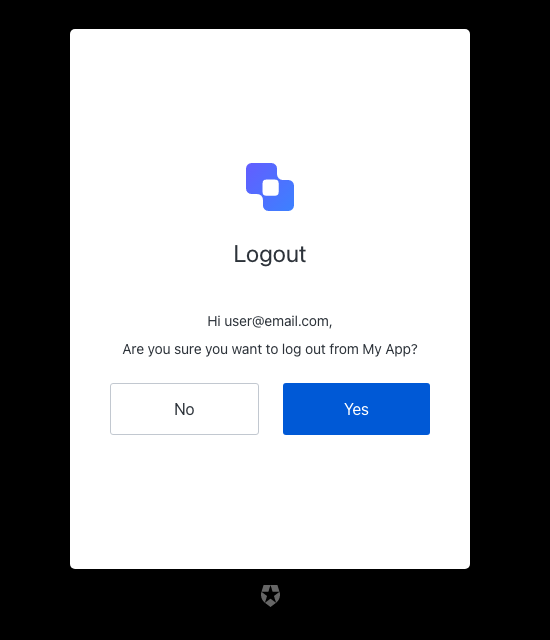
| Logout $ | pageTitle |
| Logout | title |
| Hi $, | userSalute |
| Are you sure you want to log out from $? | description |
| Yes | acceptButtonText |
| No | declineButtonText |
| ${companyName} | logoAltText |
mfa
mfa
Screen: mfa-detect-browser-capabilities
| Text | Key |
|---|---|
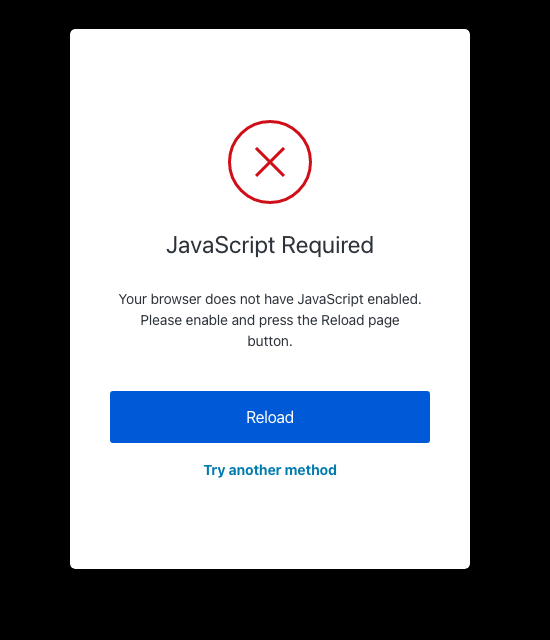
| Try another method | pickAuthenticatorText |
| Reload | reloadButtonText |
| JavaScript Required | noJSErrorTitle |
| Your browser does not have JavaScript enabled. Please enable and press the Reload page button. | noJSErrorDescription |
Screen: mfa-enroll-result
| Text | Key |
|---|---|
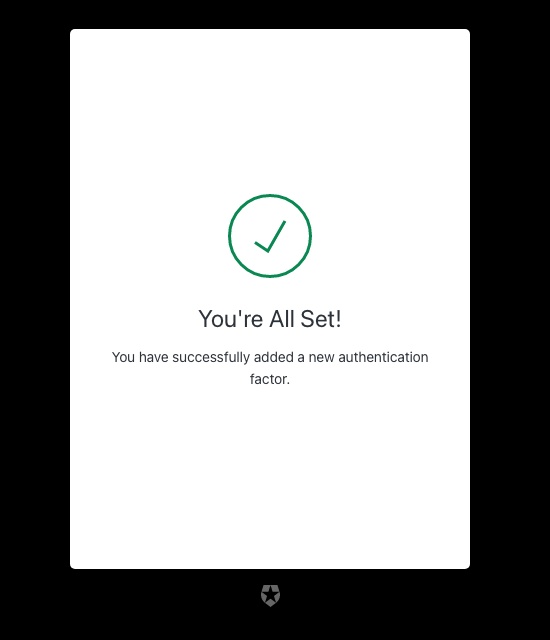
| MFA enrollment status | pageTitle |
| You’re All Set! | enrolledTitle |
| You have successfully added a new authentication factor. | enrolledDescription |
| Invalid Link | invalidTicketTitle |
| This link is invalid or expired. | invalidTicketDescription |
| Expired Link | expiredTicketTitle |
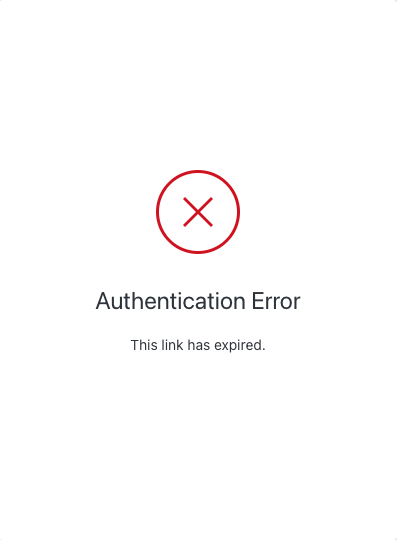
| This link is expired. | expiredTicketDescription |
| Already used | alreadyUsedTitle |
| This link has already been used. Please get a new link to enroll with Multi-factor Authentication. | alreadyUsedDescription |
| Two-factor Verification has Already Been Enabled. | alreadyEnrolledDescription |
| Something Went Wrong | genericError |
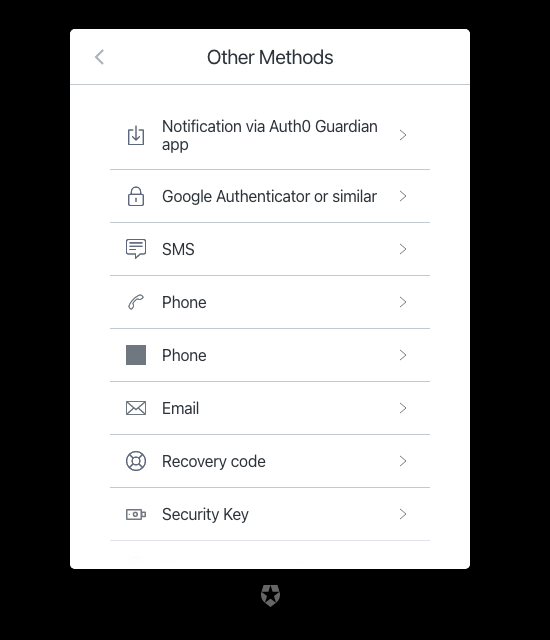
Screen: mfa-login-options
| Text | Key |
|---|---|
| List of other login methods $ | pageTitle |
| Go back | backText |
| Other Methods | title |
| SMS | authenticatorNamesSMS |
| Phone | authenticatorNamesVoice |
| Phone | authenticatorNamesPhone |
| Notification via $ app | authenticatorNamesPushNotification |
| Google Authenticator or similar | authenticatorNamesOTP |
authenticatorNamesEmail | |
| Recovery code | authenticatorNamesRecoveryCode |
| Notification via DUO app | authenticatorNamesDUO |
| Security Key | authenticatorNamesWebauthnRoaming |
| Fingerprint or Face Recognition | authenticatorNamesWebauthnPlatform |
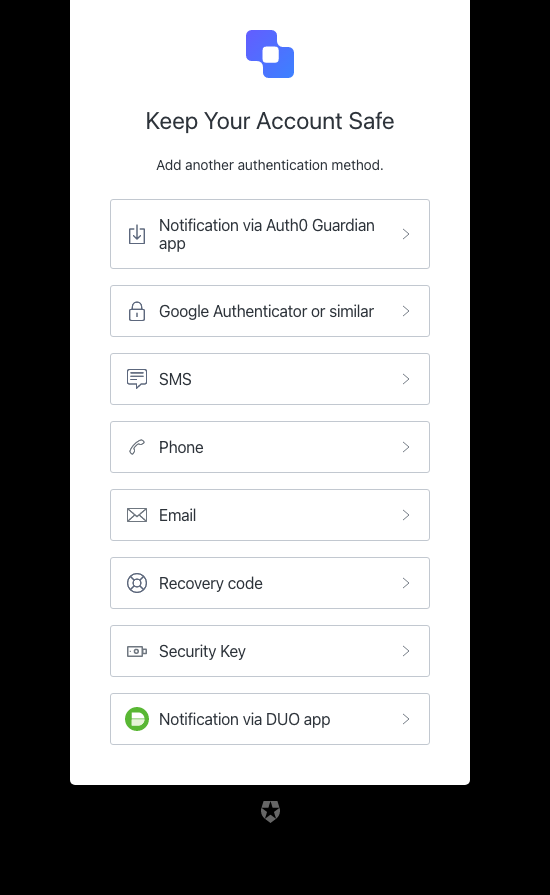
Screen: mfa-begin-enroll-options
| Text | Key |
|---|---|
| Add another authentication method $ | pageTitle |
| Go back | backText |
| Keep Your Account Safe | title |
| Add another authentication method. | description |
| ${companyName} | logoAltText |
| SMS | authenticatorNamesSMS |
| Phone | authenticatorNamesVoice |
| Phone | authenticatorNamesPhone |
| Notification via $ app | authenticatorNamesPushNotification |
| Google Authenticator or similar | authenticatorNamesOTP |
authenticatorNamesEmail | |
| Recovery code | authenticatorNamesRecoveryCode |
| Notification via DUO app | authenticatorNamesDUO |
| Security Key | authenticatorNamesWebauthnRoaming |
| Fingerprint or Face Recognition | authenticatorNamesWebauthnPlatform |
mfa-email
mfa-email
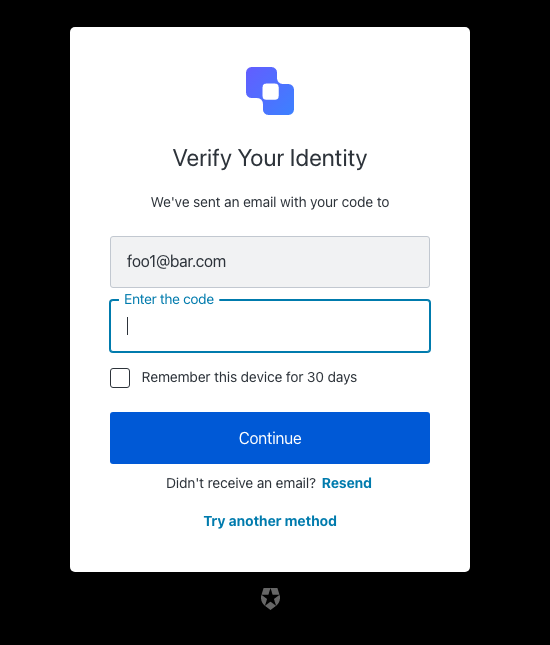
Screen: mfa-email-challenge
| Text | Key |
|---|---|
| Enter your email code to log in $ | pageTitle |
| Go Back | backText |
| Continue | buttonText |
| We’ve sent an email with your code to | description |
| Try another method | pickAuthenticatorText |
| Enter the code | placeholder |
| Remember this device for 30 days | rememberMeText |
| Resend | resendActionText |
| Didn’t receive an email? | resendText |
| Verify Your Identity | title |
| ${companyName} | logoAltText |
| OTP Code must have 6 numeric characters | invalid-otp-code-format |
| The code you entered is invalid | invalid-code |
| We couldn’t verify the code. Please try again later. | authenticator-error |
| Notification was not sent. Try resending the code. | no-transaction-in-progress |
| You have exceeded the amount of emails. Wait a few minutes and try again. | too-many-email |
| Your enrollment transaction expired, you will need to start again. | transaction-not-found |
| We couldn’t send the email. Please try again later. | mfa-email-challenge-authenticator-error |
| Please enter a code | no-code |
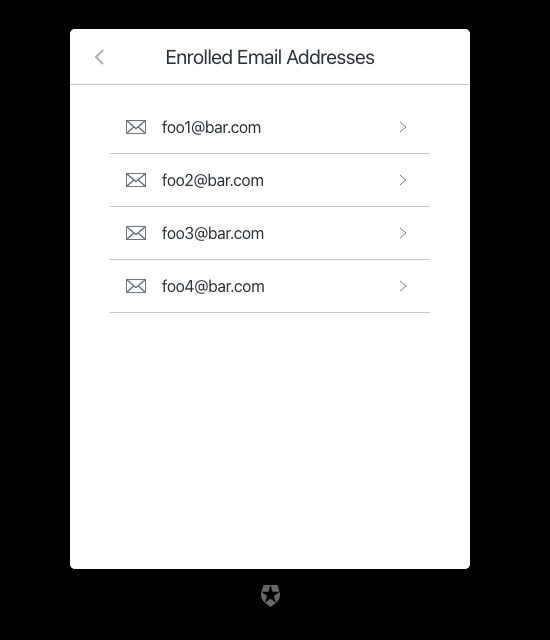
Screen: mfa-email-list
| Text | Key |
|---|---|
| List of available email addresses $ | pageTitle |
| Go back | backText |
| Enrolled Email Addresses | title |
mfa-otp
mfa-otp
Screen: mfa-otp-enrollment-qr
| Text | Key |
|---|---|
| Scan the code to log in using a one-time password $ | pageTitle |
| Secure Your Account | title |
| Scan the QR Code below using your preferred authenticator app and then enter the provided one-time code below. | description |
| Continue | buttonText |
| Trouble Scanning? | codeEnrollmentText |
| Try another method | pickAuthenticatorText |
| Enter your one-time code | placeholder |
| Then | separatorText |
| ${companyName} | logoAltText |
| OTP Code must have 6 numeric characters | invalid-otp-code-format |
| The code you entered is invalid | invalid-code |
| Too many failed codes. Wait for some minutes before retrying. | too-many-failures |
| Your enrollment transaction expired, you will need to start again. | transaction-not-found |
| You are already enrolled on MFA. | user-already-enrolled |
| Please enter a code | no-code |
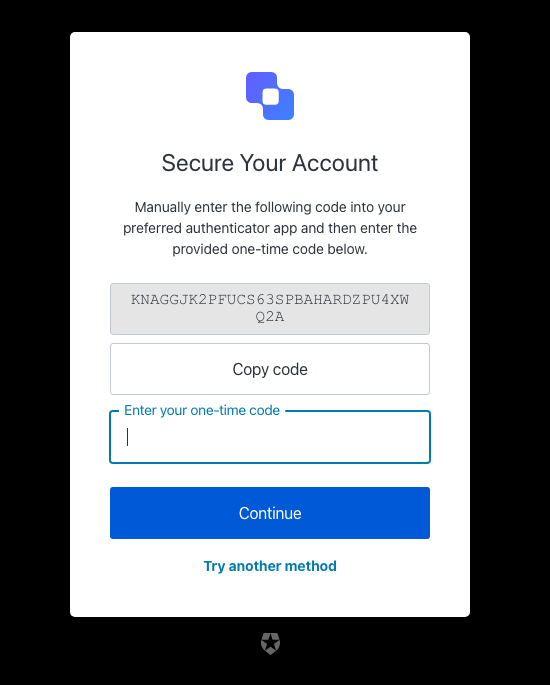
Screen: mfa-otp-enrollment-code
| Text | Key |
|---|---|
| Copy the code to log in using a one-time password $ | pageTitle |
| Go back | backText |
| Continue | buttonText |
| Secure code to copy | altText |
| Copy code | copyCodeButtonText |
| Manually enter the following code into your preferred authenticator app and then enter the provided one-time code below. | description |
| Try another method | pickAuthenticatorText |
| Enter your one-time code | placeholder |
| Secure Your Account | title |
| ${companyName} | logoAltText |
| Too many failed codes. Wait for some minutes before retrying. | too-many-failures |
| Your enrollment transaction expired, you will need to start again. | transaction-not-found |
| Please enter a code | no-code |
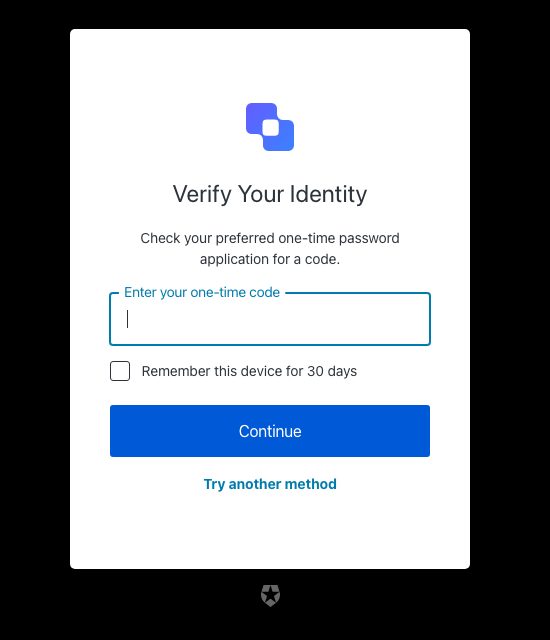
Screen: mfa-otp-challenge
| Text | Key |
|---|---|
| Enter your one-time password to log in $ | pageTitle |
| Verify Your Identity | title |
| Check your preferred one-time password application for a code. | description |
| Continue | buttonText |
| Try another method | pickAuthenticatorText |
| Enter your one-time code | placeholder |
| Remember this device for 30 days | rememberMeText |
| ${companyName} | logoAltText |
| Use password | usePasswordText |
| We couldn’t verify the code. Please try again later. | authenticator-error |
| Too many failed codes. Wait for some minutes before retrying. | too-many-failures |
| Your enrollment transaction expired, you will need to start again. | transaction-not-found |
| Please enter a code | no-code |
mfa-phone
mfa-phone
Screen: mfa-phone-challenge
| Text | Key |
|---|---|
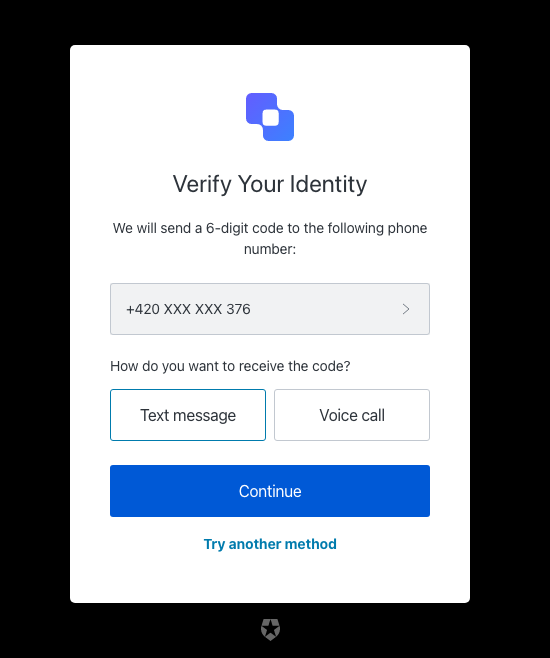
| Use your phone number to log in $ | pageTitle |
| Verify Your Identity | title |
| We will send a 6-digit code to the following phone number: | description |
| Continue | continueButtonText |
| Choose another phone number. | changePhoneText |
| Text message | smsButtonText |
| Voice call | voiceButtonText |
| How do you want to receive the code? | chooseMessageTypeText |
| Try another method | pickAuthenticatorText |
| Enter your phone number | placeholder |
| ${companyName} | logoAltText |
| There was a problem sending the SMS | send-sms-failed |
| There was a problem making the voice call | send-voice-failed |
| Phone number can only include digits. | invalid-phone-format |
| It seems that your phone number is not valid. Please check and retry. | invalid-phone |
| You have exceeded the maximum number of phone messages per hour. Wait a few minutes and try again. | too-many-sms |
| You have exceeded the maximum number of phone messages per hour. Wait a few minutes and try again. | too-many-voice |
| Your enrollment transaction expired, you will need to start again. | transaction-not-found |
| Please enter a phone number | no-phone |
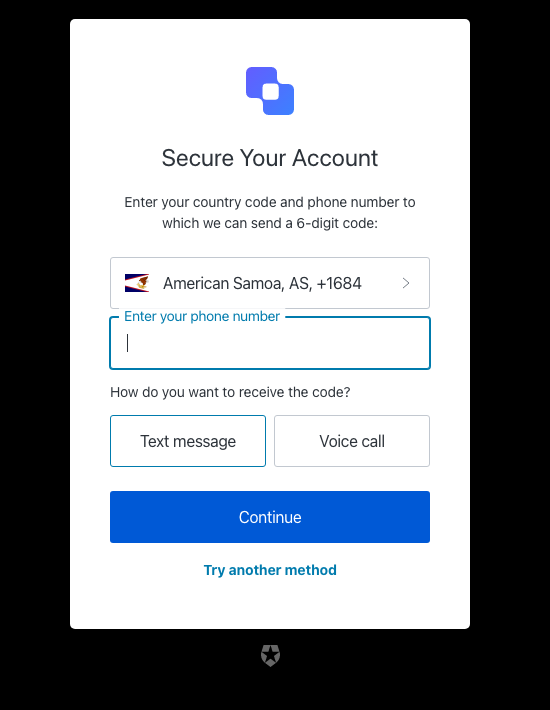
Screen: mfa-phone-enrollment
| Text | Key |
|---|---|
| Enter your phone number to log in using a phone code $ | pageTitle |
| Secure Your Account | title |
| Enter your country code and phone number to which we can send a 6-digit code: | description |
| Continue | continueButtonText |
| Text message | smsButtonText |
| Voice call | voiceButtonText |
| How do you want to receive the code? | chooseMessageTypeText |
| Try another method | pickAuthenticatorText |
| Enter your phone number | placeholder |
| ${companyName} | logoAltText |
| There was a problem sending the SMS | send-sms-failed |
| There was a problem making the voice call | send-voice-failed |
| We couldn’t send the SMS. Please try again later. | sms-authenticator-error |
| Phone number can only include digits. | invalid-phone-format |
| It seems that your phone number is not valid. Please check and retry. | invalid-phone |
| You have exceeded the maximum number of phone messages per hour. Wait a few minutes and try again. | too-many-sms |
| You have exceeded the maximum number of phone messages per hour. Wait a few minutes and try again. | too-many-voice |
| Your enrollment transaction expired, you will need to start again. [note: this error is not typically reachable] | transaction-not-found |
| Please enter a phone number | no-phone |
mfa-push
mfa-push
Screen: mfa-push-welcome
| Text | Key |
|---|---|
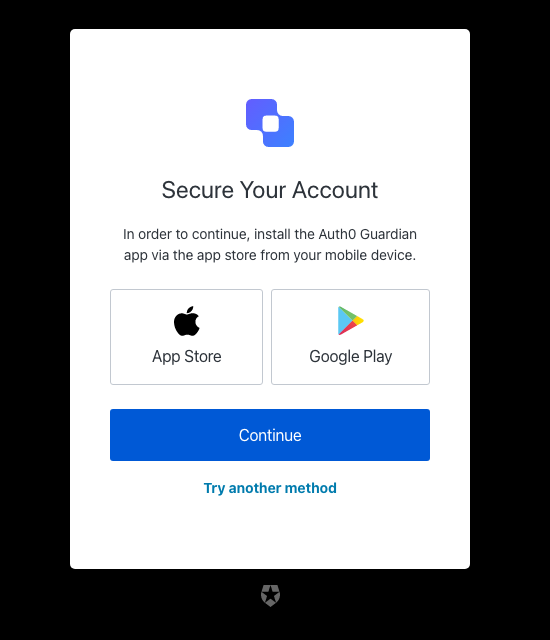
| Install the application $ | pageTitle |
| Secure Your Account | title |
| In order to continue, install the $ app via the app store from your mobile device. | description |
| Google Play | androidButtonText |
| Continue | buttonText |
| App Store | iosButtonText |
| Try another method | pickAuthenticatorText |
| ${companyName} | logoAltText |
Screen: mfa-push-enrollment-qr
| Text | Key |
|---|---|
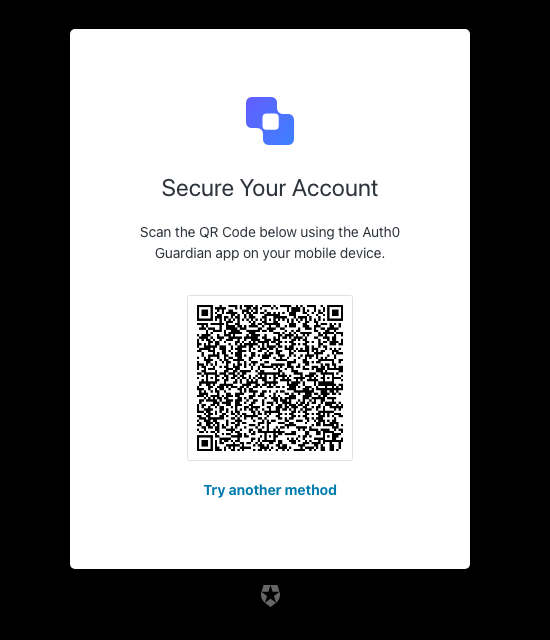
| Scan the code to log in using a push notification $ | pageTitle |
| Secure Your Account | title |
| Scan the QR Code below using the $ app on your mobile device. | description |
| Try another method | pickAuthenticatorText |
| Continue | buttonText |
| ${companyName} | logoAltText |
| You must scan the QR code with the $ app on your mobile device. | enrollment-transaction-pending |
Screen: mfa-push-challenge-push
| Text | Key |
|---|---|
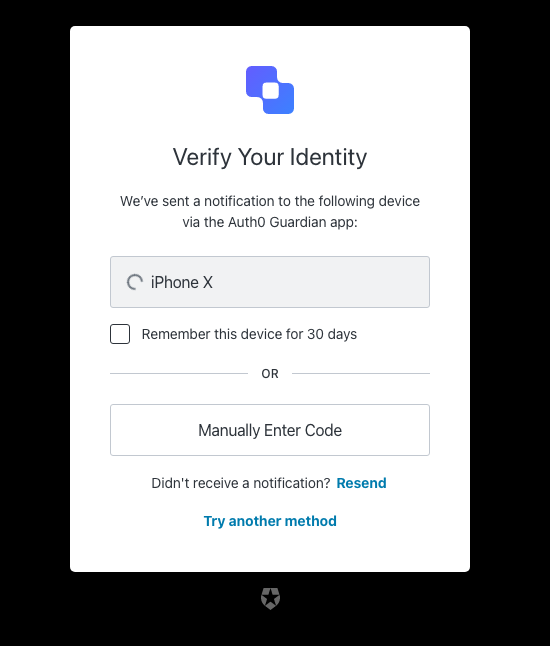
| Accept the push notification to log in $ | pageTitle |
| Verify Your Identity | title |
| We’ve sent a notification to the following device via the $ app: | description |
| I’ve responded on my device | buttonText |
| Try another method | pickAuthenticatorText |
| Remember this device for 30 days | rememberMeText |
| Resend | resendActionText |
| Didn’t receive a notification? | resendText |
| Manually Enter Code | enterOtpCode |
| OR | separatorText |
| ${companyName} | logoAltText |
| You must accept the notification via the $ app on your mobile device. | challenge-transaction-pending |
| We have not received a confirmation, please slow down. | polling-interval-exceeded |
| We have received too many notification requests. Wait a few minutes and try again. | too-many-push |
| Your enrollment transaction expired, you will need to start again. | transaction-not-found |
| We have not received a confirmation, please try scanning the code again. | mfa-push-verify-transaction-pending |
| We couldn’t verify the enrollment. Please try again later. | mfa-push-verify-authenticator-error |
| We couldn’t send the notification. Please try again later. | mfa-push-challenge-authenticator-error |
| Notification rejected | transaction-rejected |
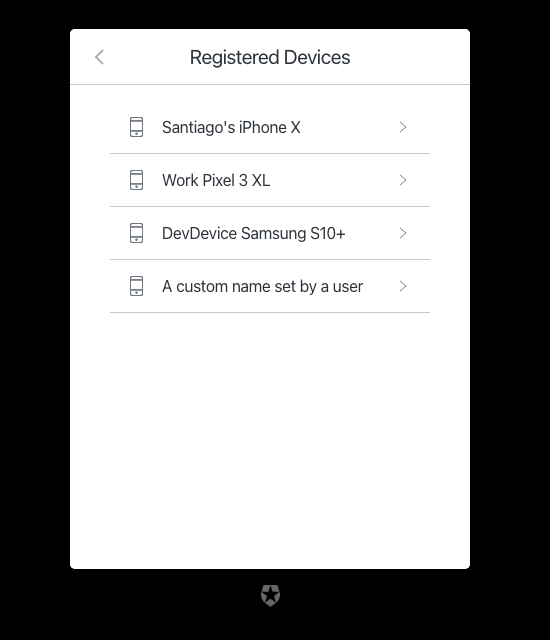
Screen: mfa-push-list
| Text | Key |
|---|---|
| List of available devices $ | pageTitle |
| Go back | backText |
| Registered Devices | title |
mfa-recovery-code
mfa-recovery-code
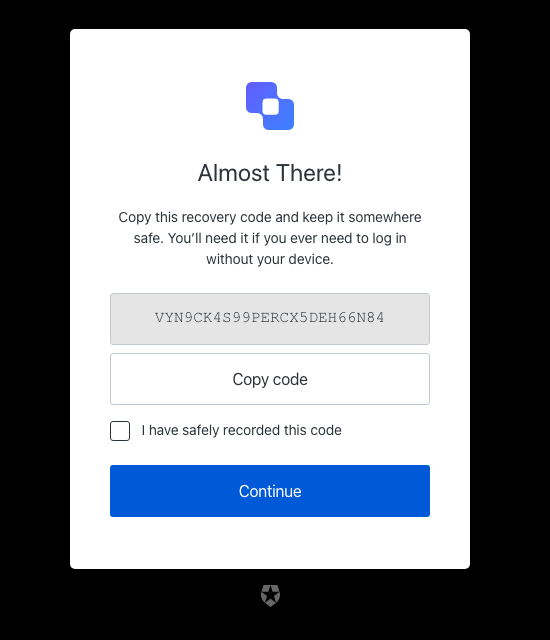
Screen: mfa-recovery-code-enrollment
| Text | Key |
|---|---|
| Copy your recovery code for safe keeping $ | pageTitle |
| Almost There! | title |
| Copy this recovery code and keep it somewhere safe. You’ll need it if you ever need to log in without your device. | description |
| Secure code to copy | altText |
| Continue | buttonText |
| I have safely recorded this code | checkboxText |
| Copy code | copyCodeButtonText |
| ${companyName} | logoAltText |
| Please confirm you have recorded the code | no-confirmation |
Screen: mfa-recovery-code-challenge
| Text | Key |
|---|---|
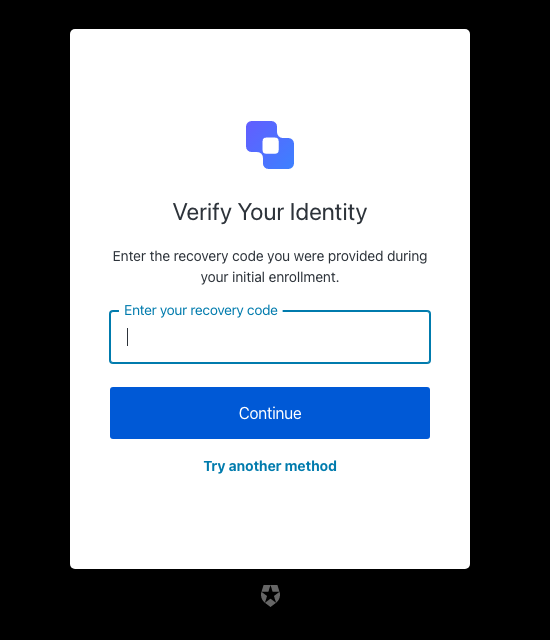
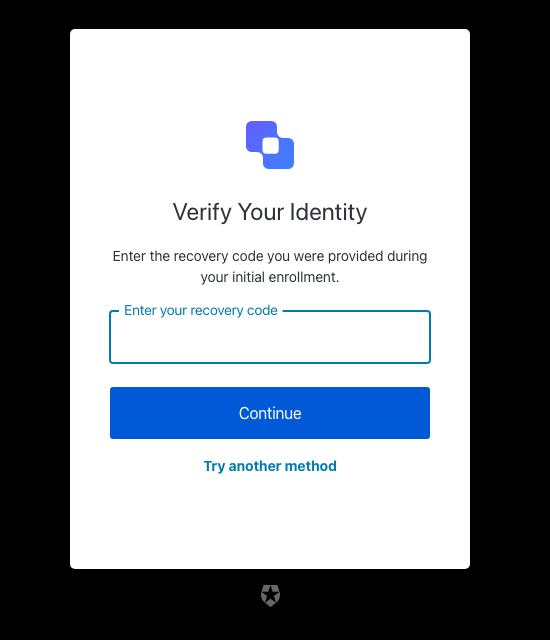
| Enter your recovery code to log in $ | pageTitle |
| Verify Your Identity | title |
| Enter the recovery code you were provided during your initial enrollment. | description |
| Continue | buttonText |
| Try another method | pickAuthenticatorText |
| Enter your recovery code | placeholder |
| ${companyName} | logoAltText |
| The code you entered is invalid | invalid-code |
| Recovery code must have 24 alphanumeric characters | invalid-code-format |
| We couldn’t verify the code. Please try again later. | authenticator-error |
| Please confirm you have recorded the code | no-confirmation |
| Too many failed codes. Wait for some minutes before retrying. | too-many-failures |
| Your enrollment transaction expired, you will need to start again. | transaction-not-found |
mfa-sms
mfa-sms
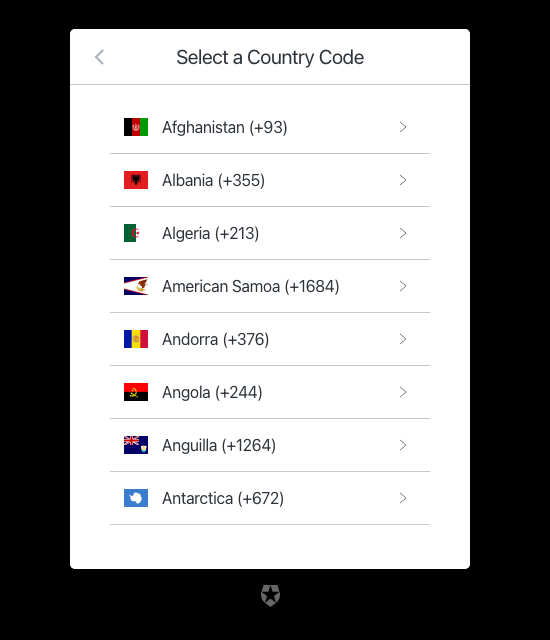
Screen: mfa-country-codes
| Text | Key |
|---|---|
| Select your country code $ | pageTitle |
| Go back | backText |
| Select a Country Code | title |
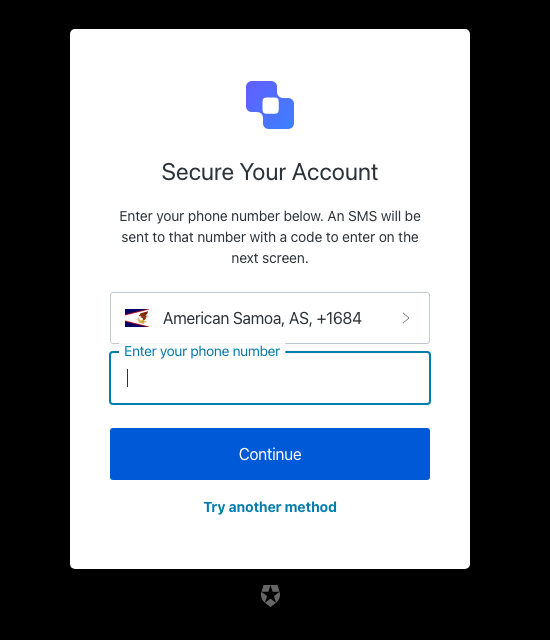
Screen: mfa-sms-enrollment
| Text | Key |
|---|---|
| Enter your phone number to log in using a text message $ | pageTitle |
| Secure Your Account | title |
| Enter your phone number below. An SMS will be sent to that number with a code to enter on the next screen. | description |
| Continue | buttonText |
| Try another method | pickAuthenticatorText |
| Enter your phone number | placeholder |
| ${companyName} | logoAltText |
| There was a problem sending the SMS | send-sms-failed |
| We couldn’t send the SMS. Please try again later. | sms-authenticator-error |
| Phone number can only include digits. | invalid-phone-format |
| Seems that your phone number is not valid. Please check and retry. | invalid-phone |
| You have exceeded the maximum number of phone messages per hour. Wait a few minutes and try again. | too-many-sms |
| Your enrollment transaction expired, you will need to start again. | transaction-not-found |
| Please enter a phone number | no-phone |
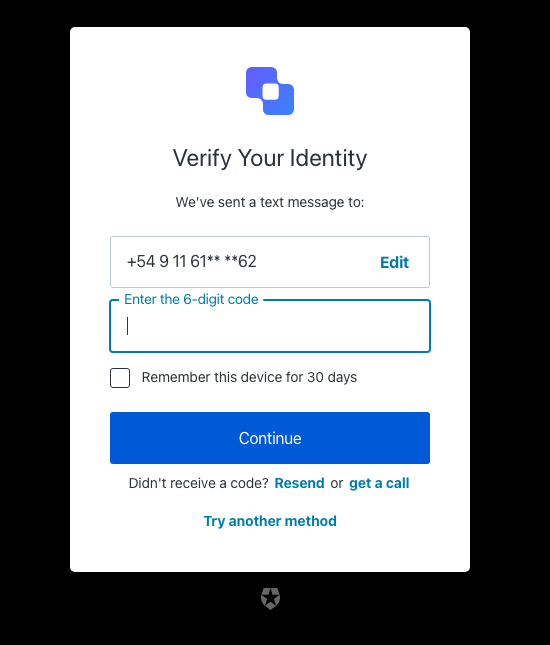
Screen: mfa-sms-challenge
| Text | Key |
|---|---|
| Enter your phone code to log in $ | pageTitle |
| Verify Your Identity | title |
| We’ve sent a text message to: | description |
| Continue | buttonText |
| Edit | editText |
| Edit phone number | editLinkScreenReadableText |
| Try another method | pickAuthenticatorText |
| Enter the 6-digit code | placeholder |
| Remember this device for 30 days | rememberMeText |
| Resend | resendActionText |
| Didn’t receive a code? | resendText |
| or | resendVoiceActionSeparatorTextBefore |
| get a call | resendVoiceActionText |
| ${companyName} | logoAltText |
| OTP Code must have 6 numeric characters | invalid-otp-code-format |
| The code you entered is invalid | invalid-code |
| There was a problem sending the SMS | send-sms-failed |
| We couldn’t verify the code. Please try again later. | authenticator-error |
| We couldn’t send the SMS. Please try again later. | sms-authenticator-error |
| Notification was not sent. Try resending the code. | no-transaction-in-progress |
| Too many failed codes. Wait for some minutes before retrying. | too-many-failures |
| You have exceeded the maximum number of phone messages per hour. Wait a few minutes and try again. | too-many-sms |
| Your enrollment transaction expired, you will need to start again. | transaction-not-found |
| Please enter a code | no-code |
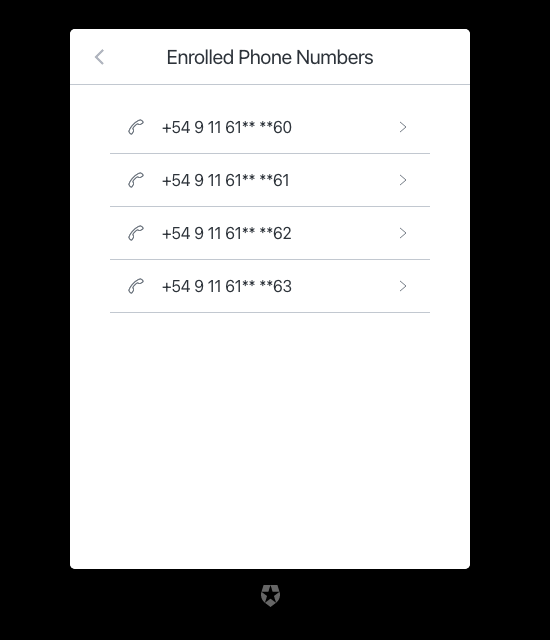
Screen: mfa-sms-list
| Text | Key |
|---|---|
| List of available phone numbers $ | pageTitle |
| Go back | backText |
| Enrolled Phone Numbers | title |
mfa-voice
mfa-voice
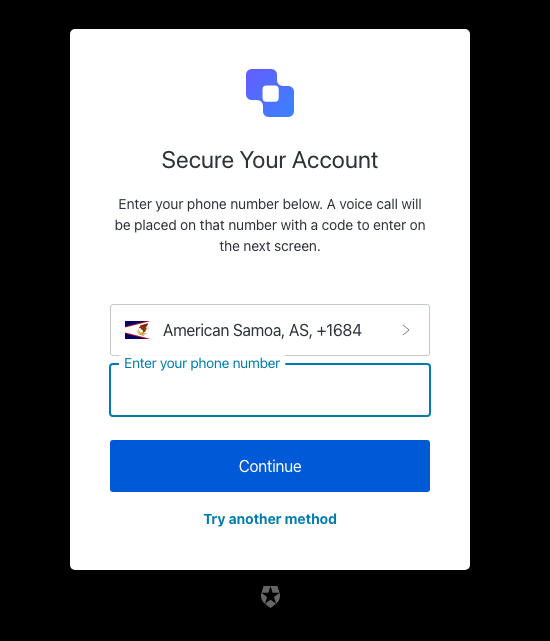
Screen: mfa-voice-enrollment
| Text | Key |
|---|---|
| Enter your phone number to log in using a phone code $ | pageTitle |
| Secure Your Account | title |
| Enter your phone number below. A voice call will be placed on that number with a code to enter on the next screen. | description |
| Continue | buttonText |
| Try another method | pickAuthenticatorText |
| Enter your phone number | placeholder |
| ${companyName} | logoAltText |
| There was a problem sending the SMS | send-sms-failed |
| Phone number can only include digits. | invalid-phone-format |
| Seems that your phone number is not valid. Please check and retry. | invalid-phone |
| You have exceeded the maximum number of phone messages per hour. Wait a few minutes and try again. | too-many-sms |
| Your enrollment transaction expired, you will need to start again. | transaction-not-found |
| Please enter a phone number | no-phone |
Screen: mfa-voice-challenge
| Text | Key |
|---|---|
| Enter your phone code to log in $ | pageTitle |
| Verify Your Identity | title |
| We’ve sent a 6-digit code via voice phone call to the following phone number: | description |
| Continue | buttonText |
| Edit | editText |
| Edit phone number | editLinkScreenReadableText |
| Choose another phone number. | changePhoneText |
| Try another method | pickAuthenticatorText |
| Enter the 6-digit code | placeholder |
| Remember this device for 30 days | rememberMeText |
| Call again | resendActionText |
| Didn’t receive a call? | resendText |
| or | resendSmsActionSeparatorTextBefore |
| send a text | resendSmsActionText |
| ${companyName} | logoAltText |
| OTP Code must have 6 numeric characters | invalid-otp-code-format |
| The code you entered is invalid | invalid-code |
| There was a problem making the voice call | send-voice-failed |
| We couldn’t verify the code. Please try again later. | authenticator-error |
| We couldn’t make the voice call. Please try again later. | voice-authenticator-error |
| Notification was not sent. Try resending the code. | no-transaction-in-progress |
| Too many failed codes. Wait for some minutes before retrying. | too-many-failures |
| You have exceeded the maximum number of phone messages per hour. Wait a few minutes and try again. | too-many-voice |
| Your enrollment transaction expired, you will need to start again. | transaction-not-found |
| Please enter a code | no-code |
mfa-webauthn
mfa-webauthn
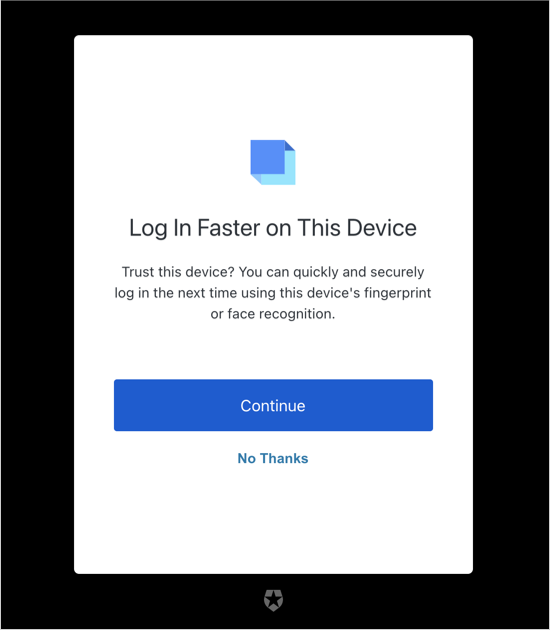
Screen: mfa-webauthn-platform-enrollment
| Text | Key |
|---|---|
| Log in faster on this device $ | pageTitle |
| Log In Faster on This Device | title |
| Trust this device? You can quickly and securely log in the next time using this device’s fingerprint or face recognition. | description |
| Awaiting device confirmation | awaitingConfirmation |
| ${companyName} | logoAltText |
| Continue | continueButtonText |
| Try another method | pickAuthenticatorText |
| Remind me later | snoozeEnrollmentButtonText |
| Not on this device | refuseAddingDeviceText |
| Not now | skipAddingDeviceText |
| We could not start the device enrollment. Please try again later. | webauthn-platform-associate-error |
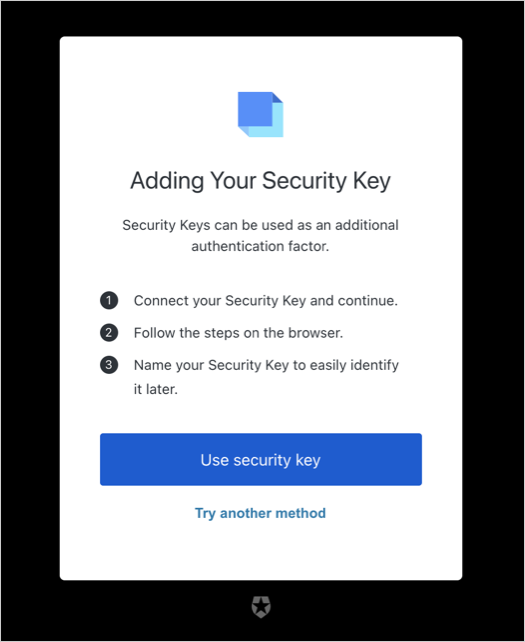
Screen: mfa-webauthn-roaming-enrollment
| Text | Key |
|---|---|
| Register your security key $ | pageTitle |
| Adding Your Security Key | title |
| Security Keys can be used as an additional authentication factor. | description |
| Awaiting Security Key | awaitingConfirmation |
| ${companyName} | logoAltText |
| Use security key | continueButtonText |
| Try another method | pickAuthenticatorText |
| Connect your Security Key and continue. | instructions1 |
| Follow the steps on the browser. | instructions2 |
| Name your Security Key to easily identify it later. | instructions3 |
| We could not start the security key enrollment. Please try again later. | webauthn-associate-error |
Screen: mfa-webauthn-platform-challenge
| Text | Key |
|---|---|
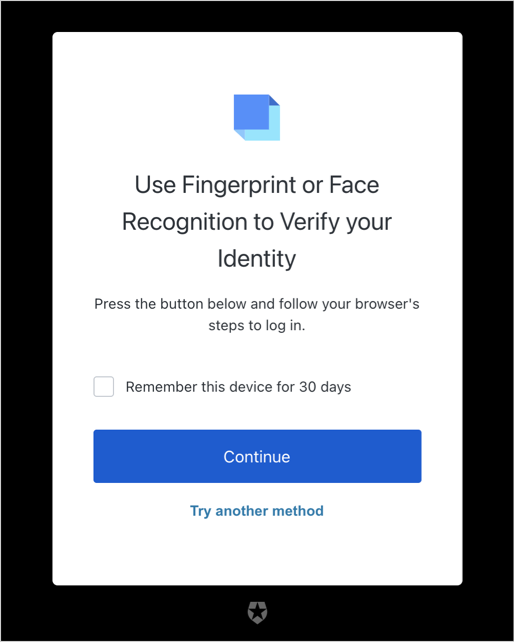
| Use fingerprint or face recognition to login $ | title |
| Press the button below and follow your browser’s steps to log in. | description |
| Awaiting device confirmation | awaitingConfirmation |
| Too many failed authentication attempts. Please try again later. | too-many-webauthn-challenge-attempts-error |
| ${companyName} | logoAltText |
| Continue | continueButtonText |
| Try another method | pickAuthenticatorText |
| Use password | usePasswordText |
| Remember this device for 30 days | rememberMeText |
| We could not start the device verification. Please try again later. | webauthn-platform-challenge-error |
Screen: mfa-webauthn-roaming-challenge
| Text | Key |
|---|---|
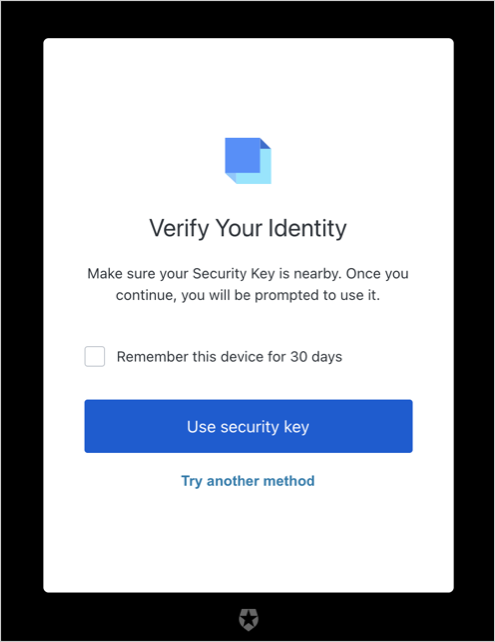
| Use your security key to log in $ | pageTitle |
| Verify Your Identity | title |
| Make sure your Security Key is nearby. Once you continue, you will be prompted to use it. | description |
| Awaiting Security Key | awaitingConfirmation |
| Too many failed authentication attempts. Please try again later. | too-many-webauthn-challenge-attempts-error |
| ${companyName} | logoAltText |
| Use security key | continueButtonText |
| Try another method | pickAuthenticatorText |
| Remember this device for 30 days | rememberMeText |
| We could not start the security key verification. Please try again later. | webauthn-challenge-error |
Screen: mfa-webauthn-change-key-nickname
| Text | Key |
|---|---|
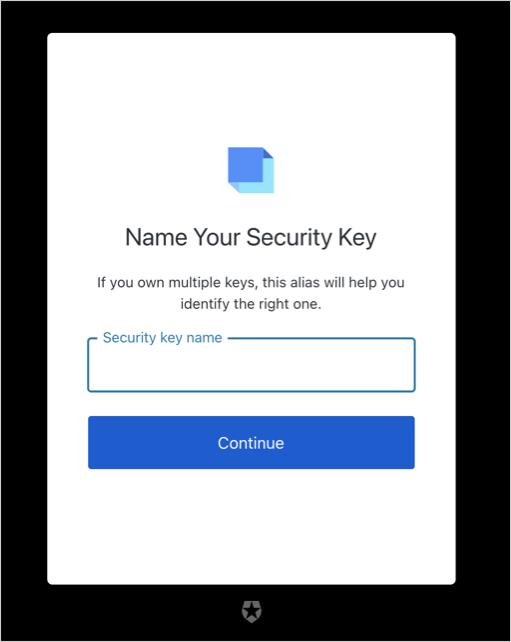
| Name your security key $ | title |
| If you own multiple keys, this alias will help you identify the right one. | description |
| ${userName}‘s key | nickname |
| Security key name | nicknamePlaceholder |
| Name your device | ${clientName} |
| If you own multiple devices, this alias will help you identify the right one. | descriptionPlatform |
| \{userName}'s | nicknamePlatform |
| Device name | nicknamePlaceholderPlatform |
| Continue | buttonText |
| ${companyName} | logoAltText |
| We could not update your key’s name. Please try again. | webauthn-patch-nickname-error |
| We could not update your Device’s name. Please try again. | webauthn-platform-patch-nickname-error |
| Name is required | no-nickname |
| Name is too short | nickname-too-short |
| Name is too long | nickname-too-long |
| An error occurred while retrieving your information. Please try again. | error-while-retrieving-authenticator |
| An error occurred while trying to save the name . Please try again. | error-while-patching |
Screen: mfa-webauthn-enrollment-success
| Text | Key |
|---|---|
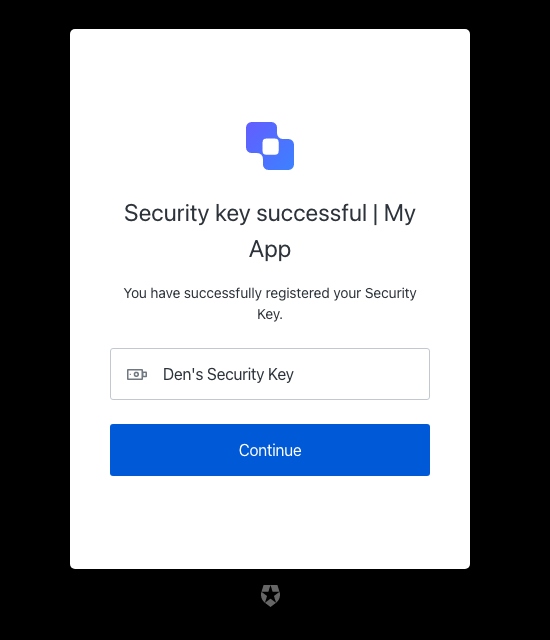
| Security key successful $ | title |
| Device registration successful $ | titlePlatform |
| You have successfully registered your Security Key. | description |
| You have successfully registered your device. | descriptionPlatform |
| Continue | buttonText |
| ${companyName} | logoAltText |
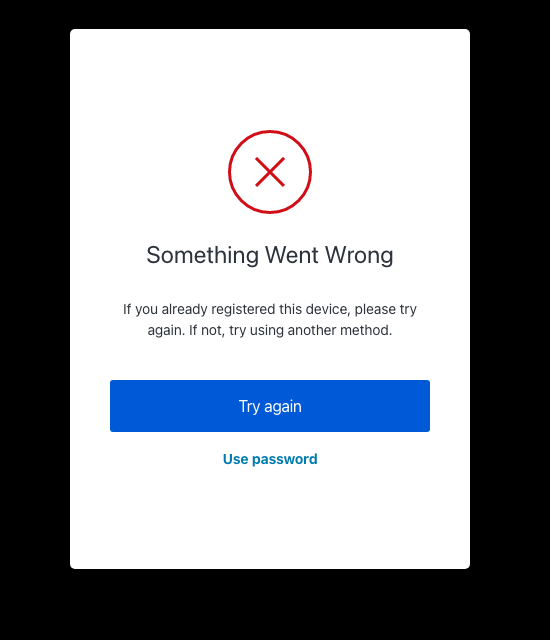
Screen: mfa-webauthn-error
| Text | Key |
|---|---|
| Try again | tryAgainLinkText |
| Try another method | pickAuthenticatorText |
| Security key registration error | ${clientName} |
| Security Key Verification Failed | errorTitleChallenge |
| Device registration error | ${clientName} |
| Something Went Wrong | errorTitlePlatformChallenge |
| Something went wrong. Please try again or try using another method. | description |
| If you already registered this device, please try again. If not, try using another method. | descriptionPlatform |
| No Thanks | refuseAddingAuthenticatorText |
| Use password | usePasswordText |
Screen: mfa-webauthn-not-available-error
| Text | Key |
|---|---|
| Security keys are not supported $ | pageTitle |
| Security Keys Are Not Supported | errorTitle |
| We are sorry but your browser or device does not support Security Keys. Try using another browser or log in from another device. | errorDescription |
| Try another method | pickAuthenticatorText |
| Use password | usePasswordText |
organizations
organizations
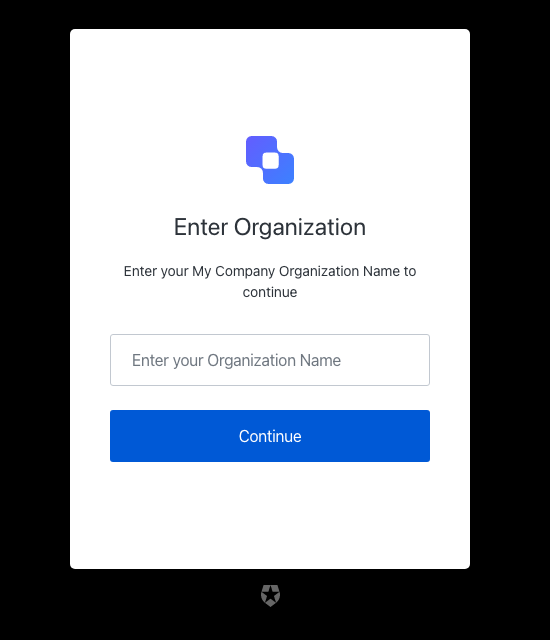
Screen: organization-selection
| Text | Key |
|---|---|
| Enter your organization $ | pageTitle |
| Continue | buttonText |
| Enter your $ Organization Name to continue | description |
| Enter your Organization Name | placeholder |
| Enter Organization | title |
| ${companyName} | logoAltText |
| The organization you entered is invalid | invalid-organization |
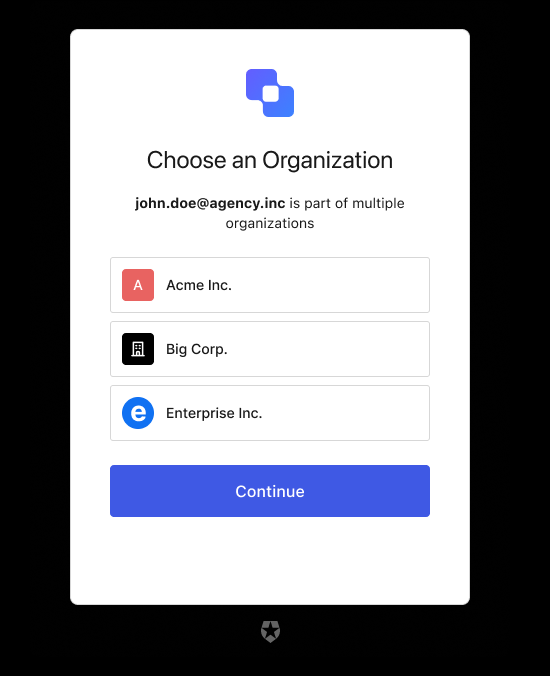
Screen: organization-picker
| Text | Key |
|---|---|
| Choose an Organization | pageTitle |
| is a part of multiple organizations. | loggedInText |
| is used as a personal account and is a part of multiple organizations. | loggedInTextB2C |
| Choose an Organization | title |
| Choose an Account to Continue | titleB2C |
| <%= ”$” %> | logoAltText |
| OR | separatorText |
| Continue with personal account | continueTextB2C |
reset-password
reset-password
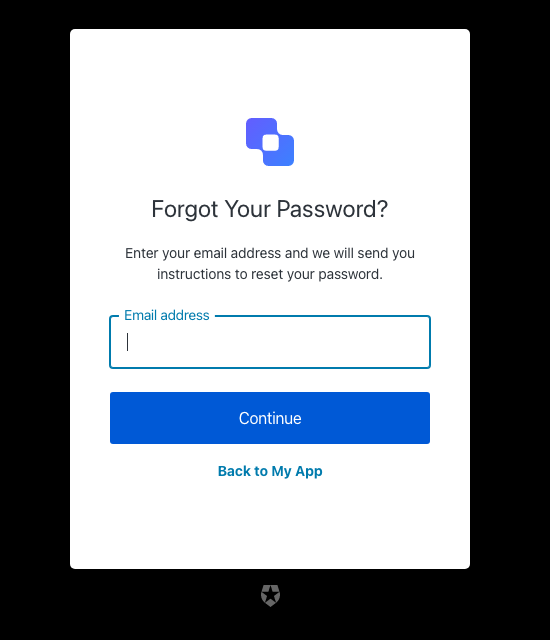
Screen: reset-password-request
| Text | Key |
|---|---|
| Reset your password | <%= ”$” %> |
| Forgot Your Password? | title |
| Back to <%= ”$” %> | backToLoginLinkText |
| Continue | buttonText |
| Enter your email address and we will send you instructions to reset your password. | descriptionEmail |
| Enter your username and we will send you instructions to reset your password. | descriptionUsername |
| Email address | placeholderEmail |
| Username | placeholderUsername |
| Email address | emailPlaceholder |
| Username | usernamePlaceholder |
| Phone number | phonePlaceholder |
| Phone or Username or Email | phoneOrUsernameOrEmailPlaceholder |
| Phone number or Email address | phoneOrEmailPlaceholder |
| Phone Number or Username | phoneOrUsernamePlaceholder |
| Username or Email address | usernameOrEmailPlaceholder |
| Enter your Email address and we will send you instructions to reset your password. | emailDescription |
| Enter your Username and we will send you instructions to reset your password. | usernameDescription |
| Enter your Phone number and we will send you instructions to reset your password. | phoneDescription |
| Enter your Phone number or Username or Email address and we will send you instructions to reset your password. | phoneOrUsernameOrEmailDescription |
| Enter your Phone number or Email address and we will send you instructions to reset your password. | phoneOrEmailDescription |
| Enter your Phone number or Username and we will send you instructions to reset your password. | phoneOrUsernameDescription |
| Enter your Username or Email address and we will send you instructions to reset your password. | usernameOrEmailDescription |
| <%= ”$” %> | logoAltText |
| This ticket was expired. | auth0-users-expired-ticket |
| Something went wrong, please try again later. | custom-script-error-code |
| This ticket was already used. | auth0-users-used-ticket |
| Something went wrong, please try again later | auth0-users-validation |
| We had a problem sending the email, please try again later. | reset-password-error |
| You have exceeded the amount of emails. Wait a few minutes and try again. | too-many-email |
| You have exceeded the amount of emails. Wait a few minutes and try again. | too-many-requests |
| Please enter an email address | no-email |
| Username is required | no-username |
| Please enter a phone number | no-phone_number |
| Phone number is not valid. | invalid-phone-format |
| Invalid Login ID entered | invalid-login-id |
| Enter a valid email address or phone number. Phone numbers must include the country code. | invalid-email-phone |
Screen: reset-password-email
| Text | Key |
|---|---|
| Check your email | <%= ”$” %> |
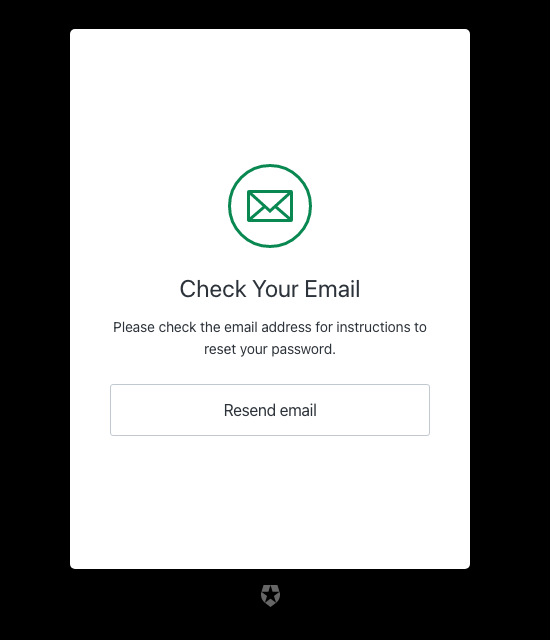
| Check Your Email | title |
| Go back | backButtonText |
| Please check the email address <%= ”$” %> for instructions to reset your password. | emailDescription |
| Resend email | resendLinkText |
| Please check the email address associated with the username <%= ”$” %> for instructions to reset your password. | usernameDescription |
Screen: reset-password
| Text | Key |
|---|---|
| Reset your password | <%= ”$” %> |
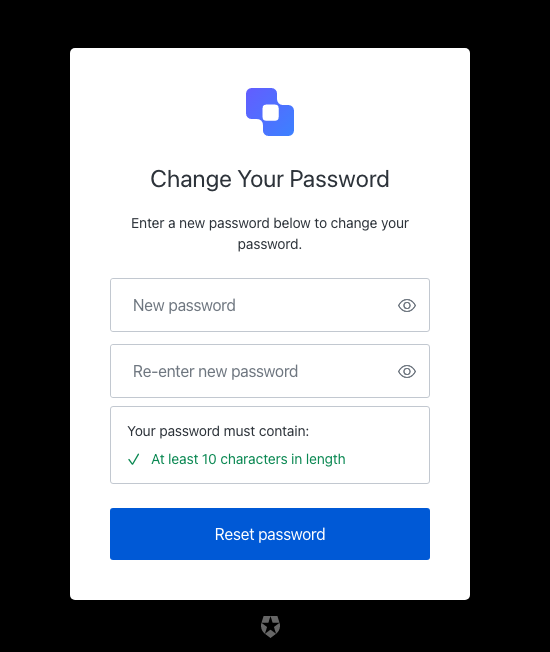
| Change Your Password | title |
| Enter a new password below to change your password. | description |
| Reset password | buttonText |
| New password | passwordPlaceholder |
| Re-enter new password | reEnterpasswordPlaceholder |
| Your password must contain: | passwordSecurityText |
| <%= ”$” %> | logoAltText |
| Show password | showPasswordText |
| Hide password | hidePasswordText |
| Fail | accessibilityError |
| Pass | accessibilityValid |
| This ticket was expired. | auth0-users-expired-ticket |
| Something went wrong, please try again later. | custom-script-error-code |
| This ticket was already used. | auth0-users-used-ticket |
| Something went wrong, please try again later | auth0-users-validation |
| Enter a new password. | no-password-reset |
| New password confirmation is missing | no-re-enter-password |
| Password contains user information | password-contains-user-information |
| Passwords don’t match | password-mismatch |
Screen: reset-password-success
| Text | Key |
|---|---|
| Password reset successful | <%= ”$” %> |
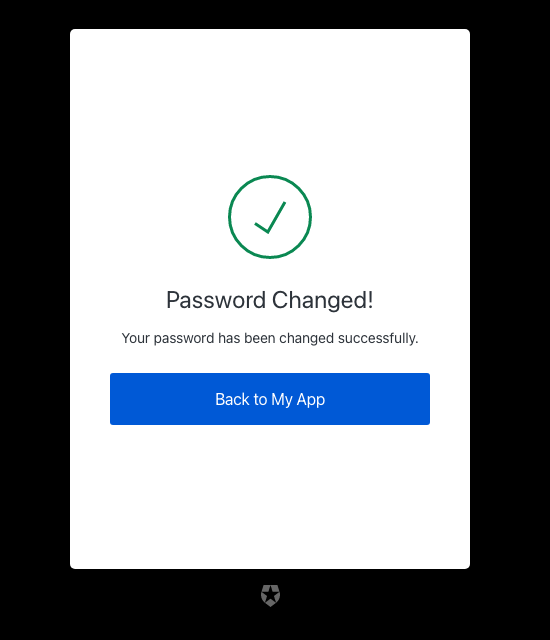
| Password Changed! | eventTitle |
| Your password has been changed successfully. | description |
| Back to <%= ”$” %> | buttonText |
Screen: reset-password-error
| Text | Key |
|---|---|
| Password reset error | <%= ”$” %> |
| Back to <%= ”$” %> | backToLoginLinkText |
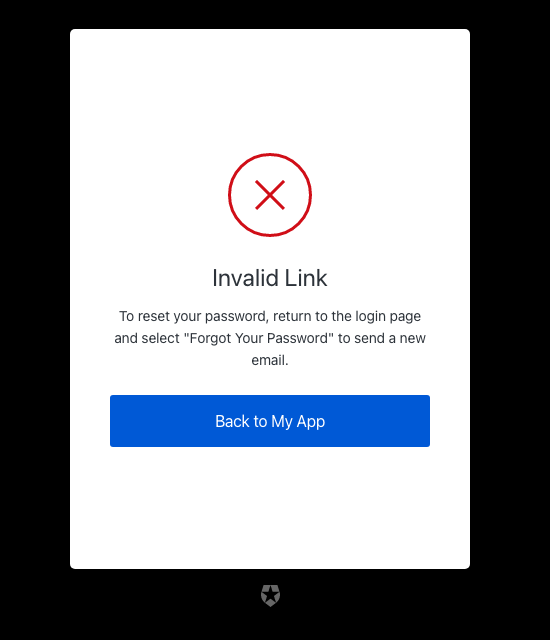
| To reset your password, return to the login page and select “Forgot Your Password” to send a new email. | descriptionExpired |
| Something went wrong. Please return to the login page and select “Forgot Your Password” to try again. | descriptionGeneric |
| This link has already been used. To reset your password, return to the login page and select “Forgot Your Password” to send a new email. | descriptionUsed |
| Link Expired | eventTitleExpired |
| Please Try Again | eventTitleGeneric |
| Invalid Link | eventTitleUsed |
| This ticket was expired. | auth0-users-expired-ticket |
| Something went wrong, please try again later. | custom-script-error-code |
| This ticket was already used. | auth0-users-used-ticket |
| Something went wrong, please try again later | auth0-users-validation |
| We had a problem sending the email, please try again later. | reset-password-error |
Screen: reset-password-mfa-email-challenge
| Text | Key |
|---|---|
| Enter your one-time password to change your password for | <%= ”$” %> |
| Go Back | backText |
| Continue | buttonText |
| We’ve sent an email with your code to | description |
| Try another method | pickAuthenticatorText |
| Enter the code | placeholder |
| Remember this device for 30 days | rememberMeText |
| Resend | resendActionText |
| Didn’t receive an email? | resendText |
| Verify Your Identity | title |
| <%= ”$” %> | logoAltText |
| OTP Code must have 6 numeric characters | invalid-otp-code-format |
| The code you entered is invalid | invalid-code |
| We couldn’t verify the code. Please try again later. | authenticator-error |
| Notification was not sent. Try resending the code. | no-transaction-in-progress |
| You have exceeded the amount of emails. Wait a few minutes and try again. | too-many-email |
| Your enrollment transaction expired, you will need to start again. | transaction-not-found |
| We couldn’t send the email. Please try again later. | mfa-email-challenge-authenticator-error |
Screen: reset-password-mfa-otp-challenge
| Text | Key |
|---|---|
| Enter your one-time password to change your password for | <%= ”$” %> |
| Verify Your Identity | title |
| Check your preferred one-time password application for a code. | description |
| Continue | buttonText |
| Try another method | pickAuthenticatorText |
| Enter your one-time code | placeholder |
| Remember this device for 30 days | rememberMeText |
| <%= ”$” %> | logoAltText |
| Use password | usePasswordText |
| We couldn’t verify the code. Please try again later. | authenticator-error |
| Too many failed codes. Wait for some minutes before retrying. | too-many-failures |
| Your enrollment transaction expired, you will need to start again. | transaction-not-found |
Screen: reset-password-mfa-phone-challenge
| Text | Key |
|---|---|
| Enter your one-time password to change your password for | <%= ”$” %> |
| Verify Your Identity | title |
| We will send a 6-digit code to the following phone number: | description |
| Continue | continueButtonText |
| Choose another phone number. | changePhoneText |
| Text message | smsButtonText |
| Voice call | voiceButtonText |
| How do you want to receive the code? | chooseMessageTypeText |
| Try another method | pickAuthenticatorText |
| Enter your phone number | placeholder |
| <%= ”$” %> | logoAltText |
| There was a problem sending the SMS | send-sms-failed |
| There was a problem making the voice call | send-voice-failed |
| Phone number can only include digits. | invalid-phone-format |
| It seems that your phone number is not valid. Please check and retry. | invalid-phone |
| You have exceeded the maximum number of phone messages per hour. Wait a few minutes and try again. | too-many-sms |
| You have exceeded the maximum number of phone messages per hour. Wait a few minutes and try again. | too-many-voice |
| Your enrollment transaction expired, you will need to start again. | transaction-not-found |
| Please enter a phone number | no-phone |
Screen: reset-password-mfa-push-challenge-push
| Text | Key |
|---|---|
| Enter your one-time password to change your password for | <%= ”$” %> |
| Verify Your Identity | title |
| We’ve sent a notification to the following device via the <%= ”$” %> app: | description |
| I’ve responded on my device | buttonText |
| Try another method | pickAuthenticatorText |
| Remember this device for 30 days | rememberMeText |
| Resend | resendActionText |
| Didn’t receive a notification? | resendText |
| Manually Enter Code | enterOtpCode |
| OR | separatorText |
| <%= ”$” %> | logoAltText |
| You must accept the notification via the <%= ”$” %> app on your mobile device. | challenge-transaction-pending |
| We have not received a confirmation, please slow down. | polling-interval-exceeded |
| We have received too many notification requests. Wait a few minutes and try again. | too-many-push |
| Your enrollment transaction expired, you will need to start again. | transaction-not-found |
| We have not received a confirmation, please try scanning the code again. | mfa-push-verify-transaction-pending |
| We couldn’t verify the enrollment. Please try again later. | mfa-push-verify-authenticator-error |
| We couldn’t send the notification. Please try again later. | mfa-push-challenge-authenticator-error |
| Notification rejected | transaction-rejected |
Screen: reset-password-mfa-recovery-code-challenge
| Text | Key |
|---|---|
| Enter your one-time password to change your password for | <%= ”$” %> |
| Verify Your Identity | title |
| Enter the recovery code you were provided during your initial enrollment. | description |
| Continue | buttonText |
| Try another method | pickAuthenticatorText |
| Enter your recovery code | placeholder |
| <%= ”$” %> | logoAltText |
| The code you entered is invalid | invalid-code |
| Recovery code must have 24 alphanumeric characters | invalid-code-format |
| We couldn’t verify the code. Please try again later. | authenticator-error |
| Please confirm you have recorded the code | no-confirmation |
| Too many failed codes. Wait for some minutes before retrying. | too-many-failures |
| Your enrollment transaction expired, you will need to start again. | transaction-not-found |
Screen: reset-password-mfa-sms-challenge
| Text | Key |
|---|---|
| Enter your one-time password to change your password for | <%= ”$” %> |
| Verify Your Identity | title |
| We’ve sent a text message to: | description |
| Continue | buttonText |
| Edit | editText |
| Edit phone number | editLinkScreenReadableText |
| Try another method | pickAuthenticatorText |
| Enter the 6-digit code | placeholder |
| Remember this device for 30 days | rememberMeText |
| Resend | resendActionText |
| Didn’t receive a code? | resendText |
| or | resendVoiceActionSeparatorTextBefore |
| get a call | resendVoiceActionText |
| <%= ”$” %> | logoAltText |
| OTP Code must have 6 numeric characters | invalid-otp-code-format |
| The code you entered is invalid | invalid-code |
| There was a problem sending the SMS | send-sms-failed |
| We couldn’t verify the code. Please try again later. | authenticator-error |
| We couldn’t send the SMS. Please try again later. | sms-authenticator-error |
| Notification was not sent. Try resending the code. | no-transaction-in-progress |
| Too many failed codes. Wait for some minutes before retrying. | too-many-failures |
| You have exceeded the maximum number of phone messages per hour. Wait a few minutes and try again. | too-many-sms |
| Your enrollment transaction expired, you will need to start again. | transaction-not-found |
Screen: reset-password-mfa-voice-challenge
| Text | Key |
|---|---|
| Enter your one-time password to change your password for | <%= ”$” %> |
| Verify Your Identity | title |
| We’ve sent a 6-digit code via voice phone call to the following phone number: | description |
| Continue | buttonText |
| Edit | editText |
| Edit phone number | editLinkScreenReadableText |
| Choose another phone number. | changePhoneText |
| Try another method | pickAuthenticatorText |
| Enter the 6-digit code | placeholder |
| Remember this device for 30 days | rememberMeText |
| Call again | resendActionText |
| Didn’t receive a call? | resendText |
| or | resendSmsActionSeparatorTextBefore |
| send a text | resendSmsActionText |
| <%= ”$” %> | logoAltText |
| OTP Code must have 6 numeric characters | invalid-otp-code-format |
| The code you entered is invalid | invalid-code |
| There was a problem making the voice call | send-voice-failed |
| We couldn’t verify the code. Please try again later. | authenticator-error |
| We couldn’t make the voice call. Please try again later. | voice-authenticator-error |
| Notification was not sent. Try resending the code. | no-transaction-in-progress |
| Too many failed codes. Wait for some minutes before retrying. | too-many-failures |
| You have exceeded the maximum number of phone messages per hour. Wait a few minutes and try again. | too-many-voice |
| Your enrollment transaction expired, you will need to start again. | transaction-not-found |
Screen: reset-password-mfa-webauthn-platform-challenge
| Text | Key |
|---|---|
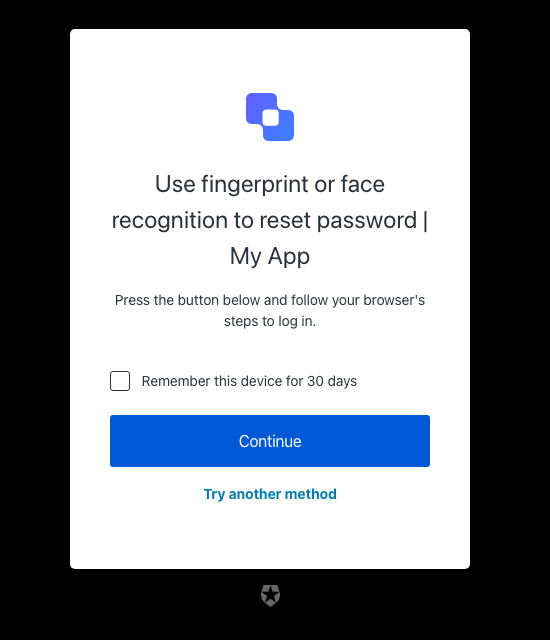
| Verify with fingerprint or face recognition | pageTitle |
| Use fingerprint or face recognition to reset password | <%= ”$” %> |
| Press the button below and follow your browser’s steps to log in. | description |
| Awaiting device confirmation | awaitingConfirmation |
| Too many failed authentication attempts. Please try again later. | too-many-webauthn-challenge-attempts-error |
| <%= ”$” %> | logoAltText |
| Continue | continueButtonText |
| Try another method | pickAuthenticatorText |
| Use password | usePasswordText |
| Remember this device for 30 days | rememberMeText |
| We could not start the device verification. Please try again later. | webauthn-platform-challenge-error |
Screen: reset-password-mfa-webauthn-roaming-challenge
| Text | Key |
|---|---|
| Use your security key to reset password | <%= ”$” %> |
| Verify Your Identity | title |
| Make sure your Security Key is nearby. Once you continue, you will be prompted to use it. | description |
| Awaiting Security Key | awaitingConfirmation |
| Too many failed authentication attempts. Please try again later. | too-many-webauthn-challenge-attempts-error |
| <%= ”$” %> | logoAltText |
| Use security key | continueButtonText |
| Try another method | pickAuthenticatorText |
| Remember this device for 30 days | rememberMeText |
| We could not start the security key verification. Please try again later. | webauthn-challenge-error |
passkey-enrollment
passkey-enrollment
Screen: passkey-enrollment
| Text | Key |
|---|---|
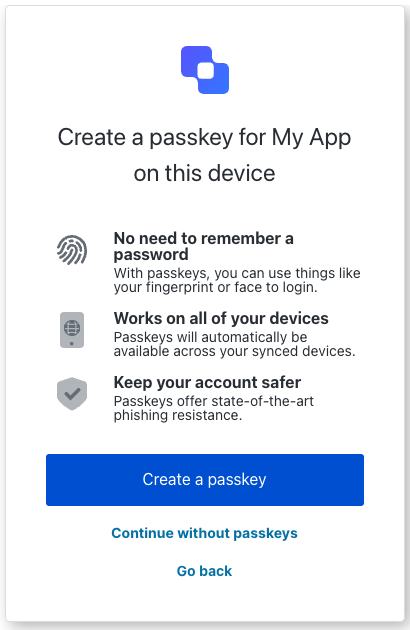
Create a passkey for ${clientName} on this device. | title |
Log in ${clientName}. | pageTitle |
Log in to \{companyName}</code> to continue to <code>{clientName}. | description |
| No need to remember a password. | passkeyBenefit1Title |
| Webauthn platform icon | passkeyBenefit1ImgAltText |
| With passkeys, you can use things like your fingerprint or face to login. | passkeyBenefit1Description |
| Works on all of your devices. | passkeyBenefit2Title |
| Device globe | passkeyBenefit2ImgAltText |
| Passkeys will automatically be available across your synced devices. | passkeyBenefit2Description |
| Keep your account safer. | passkeyBenefit3Title |
| Shield with check mark. | passkeyBenefit3ImgAltText |
| Passkeys offer state-of-the-art phishing resistance. | passkeyBenefit3Description |
| Create a passkey. | createButtonText |
| Continue without passkeys. | continueButtonText |
| Create a new passkey. | createButtonResetText |
| Create a new password. | usePasswordButtonText |
| Go back | backButtonText |
| Don’t show me this again. | checkboxText |
| The user already exists. | error_email-in-use |
| Something went wrong, please try again later. | error_auth0-users-validation |
| Password and passkey are not allowed. | error_conflict-password-passkey |
| Password is not allowed. | error_password-not-allowed |
| Passkey is not allowed. | error_passkey-not-allowed |
| Something went wrong. Please try again later. | error_invalid-passkey |
| Something went wrong. Please try again later. | error_passkey-enrollment-failure |
| You have created the maximum number of passkeys for your account. | error_passkey-enrollment-max-allowed-reached |
passkey-enrollment-local
passkey-enrollment-local
Screen: passkey-enrollment-local
| Text | Key |
|---|---|
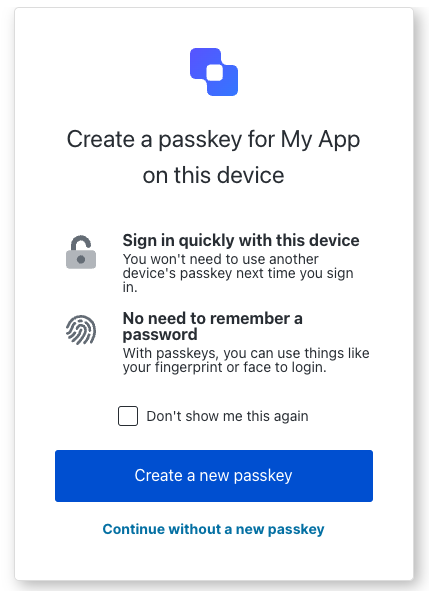
Create a passkey for ${clientName} on this device. | title |
Log in ${clientName}. | pageTitle |
Log in to \{companyName}</code> to continue to <code>{clientName}. | description |
| Sign in quickly with this device. | passkeyBenefit1Title |
| Lock | passkeyBenefit1ImgAltText |
| You won’t need to use another device’s passkey next time you sign in. | passkeyBenefit1Description |
| No need to remember a password. | passkeyBenefit2Title |
| Webauthn platform icon. | passkeyBenefit2ImgAltText |
| With passkeys, you can use things like your fingerprint or face to login. | passkeyBenefit2Description |
| Create a new passkey. | createButtonText |
| Continue without a new passkey. | continueButtonText |
| Don’t show me this again. | checkboxText |
| Something went wrong. Please try again later. | error_passkey-enrollment-failure |
| You have created the maximum number of passkeys for your account. | error_passkey-enrollment-max-allowed-reached |
phone-identifier-challenge
phone-identifier-challenge
Screen: phone-identifier-challenge
| Text | Key |
|---|---|
| Enter your phone code to log in | <%= ”$” %> |
| Verify Your Identity | title |
| We’ve sent a text message to: | smsDescription |
| We’ve sent a 6-digit code via voice phone call to the following phone number: | voiceDescription |
| Continue | buttonText |
| Go back | backButtonText |
| Enter the 6-digit code | placeholder |
| Resend | resendActionText |
| Didn’t receive a code? | resendText |
| or | resendVoiceActionSeparatorTextBefore |
| or | resendSmsActionSeparatorTextBefore |
| send a text | resendSmsActionText |
| get a call | resendVoiceActionText |
| <%= ”$” %> | logoAltText |
| Code has been resent. | resendLimitReachedText |
| OTP Code must have 6 numeric characters | invalid-otp-code-format |
| The code you entered is invalid | invalid-code |
| There was a problem making the voice call | send-voice-failed |
| There was a problem sending the SMS | send-sms-failed |
| We couldn’t verify the code. Please try again later. | authenticator-error |
| We couldn’t make the voice call. Please try again later. | voice-authenticator-error |
| We couldn’t send the SMS. Please try again later. | sms-authenticator-error |
| Notification was not sent. Try resending the code. | no-transaction-in-progress |
| Too many failed codes. Wait for some minutes before retrying. | too-many-failures |
| You have exceeded the maximum number of phone messages per hour. Wait a few minutes and try again. | too-many-voice |
| You have exceeded the maximum number of phone messages per hour. Wait a few minutes and try again. | too-many-sms |
| Your enrollment transaction expired, you will need to start again. | transaction-not-found |
phone-enrollment
phone-enrollment
Screen: phone-identifier-enrollment
| Text | Key |
|---|---|
| Use your phone number to log in | <%= ”$” %> |
| Verify Your Identity | title |
| We will send a 6-digit code to the following phone number: | description |
| Continue | continueButtonText |
| Choose another phone number. | changePhoneText |
| Text message | smsButtonText |
| Voice call | voiceButtonText |
| How do you want to receive the code? | chooseMessageTypeText |
| Go back | backButtonText |
| Enter your phone number | placeholder |
| <%= ”$” %> | logoAltText |
| There was a problem sending the SMS | send-sms-failed |
| There was a problem making the voice call | send-voice-failed |
| Phone number can only include digits. | invalid-phone-format |
| It seems that your phone number is not valid. Please check and retry. | invalid-phone |
| You have exceeded the maximum number of phone messages per hour. Wait a few minutes and try again. | too-many-sms |
| You have exceeded the maximum number of phone messages per hour. Wait a few minutes and try again. | too-many-voice |
| Your enrollment transaction expired, you will need to start again. | transaction-not-found |
| Please enter a phone number | no-phone |
signup
signup
Screen: signup
| Text | Key |
|---|---|
| Sign up | <%= ”$” %> |
| Welcome | title |
| Sign Up to <%= "" %>. | description |
| Or | separatorText |
| Continue | buttonText |
| Email address | emailPlaceholder |
| Continue with <%= "" %> | federatedConnectionButtonText |
| Log in | loginActionLinkText |
| Already have an account? | loginActionText |
| Password | passwordPlaceholder |
| Your password must contain: | passwordSecurityText |
| Username | usernamePlaceholder |
| Phone number | phonePlaceholder |
| Email address (Optional) | emailOptionalPlaceholder |
| Username (Optional) | usernameOptionalPlaceholder |
| Phone number (Optional) | phoneOptionalPlaceholder |
| <%= ”$” %> | logoAltText |
| Show password | showPasswordText |
| Hide password | hidePasswordText |
| Fail | accessibilityError |
| Pass | accessibilityValid |
| The user already exists. | email-in-use |
| The password is too weak | password-too-weak |
| The password is too weak | password-policy-not-conformant |
| The password is too common | password-too-common |
| Password has previously been used | password-previously-used |
| Passwords don’t match | password-mismatch |
| Password contains user information | password-contains-user-information |
| Username can only contain alphanumeric characters or: ’<%= "" %> and <%= ”$” %> characters. | invalid-username |
| The username must not be longer than <%= ”$” %> characters. | invalid-username-max-length |
| The username must have at least <%= ”$” %> characters. | invalid-username-min-length |
| The username has invalid characters. | invalid-username-invalid-characters |
| The username cannot be an email. | invalid-username-email-not-allowed |
| The username provided is in use already. | username-taken |
| Something went wrong, please try again later. | custom-script-error-code |
| Something went wrong, please try again later | auth0-users-validation |
| Invalid connection | invalid-connection |
| We have detected suspicious login behavior and further attempts will be blocked. Please contact the administrator. | ip-blocked |
| Too many signups from the same IP | ip-signup-blocked |
| Invalid connection | no-db-connection |
| Please enter an email address | no-email |
| Password is required | no-password |
| Enter a new password. | no-password-reset |
| New password confirmation is missing | no-re-enter-password |
| Username is required | no-username |
| At least one identifier is required | no-identifier |
| This combination of credentials was detected in a public data breach on another website. Before your account is created, please use a different password to keep it secure. | password-breached |
| We encountered an issue when attempting to sign up with a phone number. Please contact support for assistance. | invalid-phone-attribute-config |
signup-id
signup-id
Screen: signup-id
| Text | Key |
|---|---|
| Sign up | <%= ”$” %> |
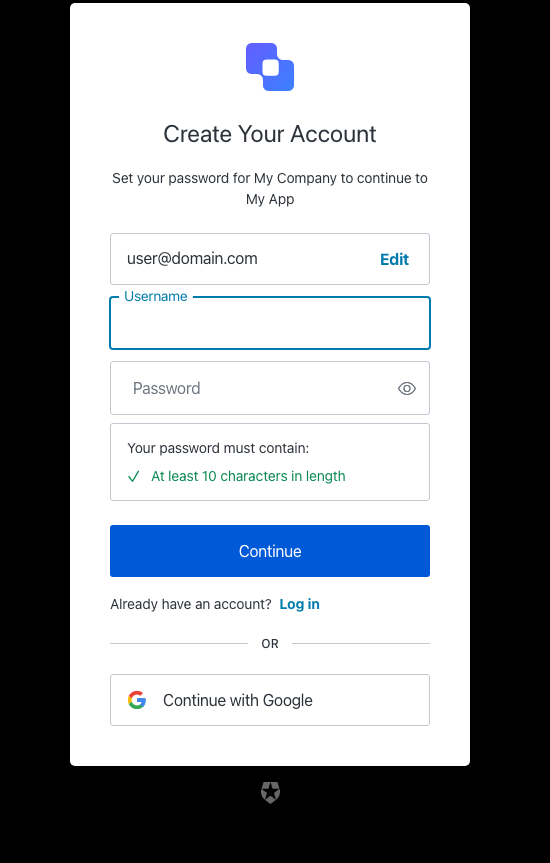
| Create Your Account | title |
| Sign Up to <%= "" %>. | description |
| Or | separatorText |
| Continue | buttonText |
| Phone number | phonePlaceholder |
| Email address | emailPlaceholder |
| Continue with <%= "" %> | federatedConnectionButtonText |
| Log in | loginActionLinkText |
| Already have an account? | loginActionText |
| Password | passwordPlaceholder |
| Your password must contain: | passwordSecurityText |
| Username | usernamePlaceholder |
| Email address (Optional) | emailOptionalPlaceholder |
| Username (Optional) | usernameOptionalPlaceholder |
| Phone number (Optional) | phoneOptionalPlaceholder |
| <%= ”$” %> | logoAltText |
| The user already exists. | email-in-use |
| The password is too weak | password-too-weak |
| The password is too weak | password-policy-not-conformant |
| The password is too common | password-too-common |
| Password has previously been used | password-previously-used |
| Passwords don’t match | password-mismatch |
| Username can only contain alphanumeric characters or: ’<%= "" %> and <%= ”$” %> characters. | invalid-username |
| The username must not be longer than <%= ”$” %> characters. | invalid-username-max-length |
| The username must have at least <%= ”$” %> characters. | invalid-username-min-length |
| The username has invalid characters. | invalid-username-invalid-characters |
| The username cannot be an email. | invalid-username-email-not-allowed |
| The username provided is in use already. | username-taken |
| Something went wrong, please try again later. | custom-script-error-code |
| Something went wrong, please try again later | auth0-users-validation |
| Invalid connection | invalid-connection |
| We have detected suspicious login behavior and further attempts will be blocked. Please contact the administrator. | ip-blocked |
| Too many signups from the same IP | ip-signup-blocked |
| Invalid connection | no-db-connection |
| Email does not match any enterprise directory | no-hrd-connection |
| Please enter an email address | no-email |
| Password is required | no-password |
| Enter a new password. | no-password-reset |
| New password confirmation is missing | no-re-enter-password |
| Username is required | no-username |
| At least one identifier is required | no-identifier |
| Enter a valid phone number | invalid-phone-number |
signup-password
signup-password
Screen: signup-password
| Text | Key |
|---|---|
| Create a password to sign up | <%= ”$” %> |
| Create Your Account | title |
| Set your password for <%= "" %> | description |
| Or | separatorText |
| Continue | buttonText |
| Phone number | phonePlaceholder |
| Email address | emailPlaceholder |
| Edit | editEmailText |
| Edit | editPhoneText |
| Edit | editUsernameText |
| Edit email address | editLinkScreenReadableText |
| Continue with <%= "" %> | federatedConnectionButtonText |
| Log in | loginActionLinkText |
| Already have an account? | loginActionText |
| Password | passwordPlaceholder |
| Your password must contain: | passwordSecurityText |
| Username | usernamePlaceholder |
| Email address (Optional) | emailOptionalPlaceholder |
| Username (Optional) | usernameOptionalPlaceholder |
| Phone number (Optional) | phoneOptionalPlaceholder |
| Go back | backButtonText |
| Accept your invitation to sign up | <%= ”$” %> |
| Sign Up to accept <%= "" %> on <%= ”$” %>. | invitationDescription |
| <%= ”$” %> | logoAltText |
| Show password | showPasswordText |
| Hide password | hidePasswordText |
| Fail | accessibilityError |
| Pass | accessibilityValid |
| The user already exists. | email-in-use |
| The password is too weak | password-too-weak |
| The password is too weak | password-policy-not-conformant |
| The password is too common | password-too-common |
| Password has previously been used | password-previously-used |
| Passwords don’t match | password-mismatch |
| Password contains user information | password-contains-user-information |
| Username can only contain alphanumeric characters or: ’<%= "" %> and <%= ”$” %> characters. | invalid-username |
| The username must not be longer than <%= ”$” %> characters. | invalid-username-max-length |
| The username must have at least <%= ”$” %> characters. | invalid-username-min-length |
| The username has invalid characters. | invalid-username-invalid-characters |
| The username cannot be an email. | invalid-username-email-not-allowed |
| The username provided is in use already. | username-taken |
| Something went wrong, please try again later. | custom-script-error-code |
| Something went wrong, please try again later | auth0-users-validation |
| Invalid connection | invalid-connection |
| We have detected suspicious login behavior and further attempts will be blocked. Please contact the administrator. | ip-blocked |
| Too many signups from the same IP | ip-signup-blocked |
| Invalid connection | no-db-connection |
| Please enter an email address | no-email |
| Password is required | no-password |
| Enter a new password. | no-password-reset |
| New password confirmation is missing | no-re-enter-password |
| Username is required | no-username |
| Enter a valid phone number | invalid-phone-number |
| This combination of credentials was detected in a public data breach on another website. Before your account is created, please use a different password to keep it secure. | password-breached |
| We encountered an issue when attempting to sign up with a phone number. Please contact support for assistance. | invalid-phone-attribute-config |
status
status
Screen: status
| Text | Key |
|---|---|
| Something Went Wrong | passwordless-no-session-title |
| The link must be opened on the same device and browser from which you submitted your email address. | passwordless-no-session |
| Start over from this device or browser | passwordless-no-session-link |
| Something Went Wrong | mfa-required-title |
| Two-factor authentication is required to access this application. To enable this, please contact your system administrator. | mfa-required |
| Something went wrong, please try again later. | custom-script-error-code |
| Something went wrong, please try again later. | auth0-users-validation |
| We are sorry, something went wrong when attempting to log in | authentication-failure |
brute-force-protection
brute-force-protection
Screen: brute-force-protection-unblock
| Text | Key |
|---|---|
| Unblock My Account | pageTitle |
| Unblock My Account | description |
| Continue | buttonText |
| ${companyName} | logoAltText |
Screen: brute-force-protection-unblock-success
| Text | Key |
|---|---|
| Unblock My Account | pageTitle |
| Unblock My Account | description |
| Continue | buttonText |
| ${companyName} | logoAltText |
Screen: brute-force-protection-unblock-failure
| Text | Key |
|---|---|
| Unblock My Account | pageTitle |
| Unblock My Account | description |
| Continue | buttonText |
| ${companyName} | logoAltText |
Custom query parameters
You can also use query parameters within the context by passing them to the/authorize endpoint when initiating the authentication request. These custom query parameters must have the ext- prefix.
The following example uses the ext-ga and ext-test query parameters to the login page template:
- Each
ext-parameter name must be unique - One authorize request can can contain a maximum of ten ext- parameters
- The
ext-parameter name must start with ext-, contain only [a-zA-z0-9_-], and be a maximum of 28 characters, as in the following:/^ext-[\w-]{1,28}$/ - The
ext-parameter value must contain only [a-zA-Z0-9-.*~@+ /:_], and be a maximum of 255 characters, as in the following:/^[-\w.*~@+ /:]{1,255}$/
Custom signup prompts
If you use custom signup prompts, you must enable custom page templates. The following is the minimum template that allows custom signup prompts to render:Examples
Login box + image layout
The following template will show the login box to the left, and an image to the right only for the login/signup pages. The rest of the pages will look like the default ones.Page footers
The example below adds a gray footer with links to Privacy Policy and Terms of Services:Page templates API
To set the page template, you need to use the . You first need to get a Management API token with theupdate:branding, read:branding, delete:branding scopes. If you are using the API Explorer Application to generate tokens, make sure those scopes are enabled for the Auth0 Management API.
To set the template, you need to use the following endpoint:
CSS customization
Page template limitations:
- CSS class names change each time Auth0 builds the project. Custom CSS that targets these classes will break with each new build.
- The HTML structure of Universal Login pages is subject to change. Avoid customizations that rely on the HTML structure to prevent any interruptions.
-
You can resize the login prompt by enclosing the variables below in
<style>tags in the<head>element.-
Use
--prompt-widthto adjust the container width. Its default value is 400px. -
For Forms: Use
--form-max-widthto set the maximum form width. Its default value is 500px.- To apply your code to the Form page only, include
{% if prompt.name == "custom-form" %} in the <head> element.
- To apply your code to the Form page only, include
-
Use
-
You can use a Google font by importing it and overriding the
--font-familyCSS variable. -
You can hide the tenant logo by adding
class="_hide-prompt-logo"in the<body>element. -
You can specify a custom logo by adding
class="_use-custom-prompt-logo"in the<body>element. This would let you, for example, change the login page logo depending on the application:
Using the Auth0 CLI
You can use the Auth0 CLI to easily update Page Templates. In the Auth0 CLI, run:auth0 universal-login customize
The Auth0 CLI will open two windows:
- A browser window with a Storybook that shows the login page with the page template applied:
- The default editor, with the page template code:
Troubleshooting
If the template is not being applied, verify that you’re navigating to{customDomain}/authorize. If you’re navigating to {yourDomain}/authorize, Auth0 will not render the page template.