Add Bot Detection to Custom Login Pages
If you build a custom login page using the auth0.js library, you can enable to render a CAPTCHA step in scenarios when a request is determined to be high risk by Auth0.
Your custom login form code must handle scenarios where the user is asked to pass a CAPTCHA step. If you don’t account for this scenario, your application may cause an error.
To learn more about the default template functions for each provider, read auth0.js/src/web-auth/captcha.js on GitHub.
Bot detection is only supported for custom login pages hosted by Auth0. You may need to contact your account representative to enable this feature for your tenant.
Use custom login page template
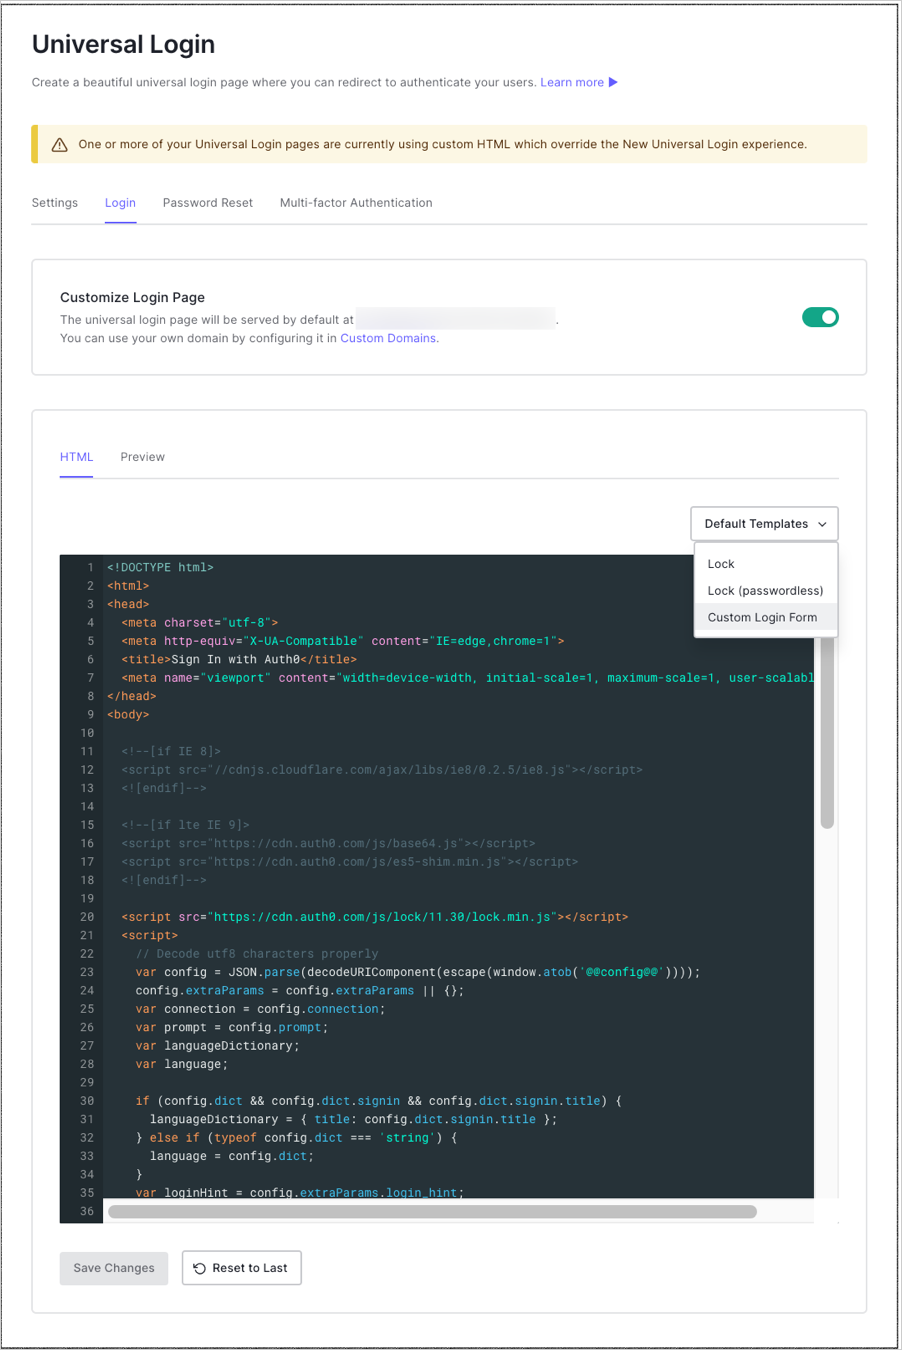
Auth0 provides a template for you to use with code to handle high-risk logins.- Go to Dashboard > Branding > Universal Login and select Classic.
- Click the Login tab and enable the Customize Login Page switch if it is not already enabled.
-
Locate the Default Templates drop-down menu and select Custom Login Form.
-
Use the provided template to begin customizing your login page.
We recommend using version control software to manage the source code of your Custom Login Pages. To learn more, read Classic Login Page Version Control.
- If you are not using version control software, you can replace the template with your source code directly in the Dashboard.
- Select Preview to see your new form.
- Select Save Changes.
Customize the login form
If you’d like to support Bot Detection, you must use version9.28 or higher of the auth0.js library.
<script src="https://cdn.auth0.com/js/auth0/9.28/auth0.min.js"></script>
-
Add an element to render the CAPTCHA below your password input and above your sign-up and login buttons. For example:
<div class="captcha-container"></div> -
Initialize the
loginCaptchaandsignupCaptchacomponents after theWebAuthconstructor. -
When you call the
loginmethod, assign thecaptchaproperty the valueloginCaptcha.getValue():To learn more about theloginmethod’s callback function parameter (cb), read WebAuth on auth0.js documentation. -
When you call the
signupAndLoginmethod, assign thecaptchaproperty the valuesignupCaptcha.getValue():To learn more about thesignupAndLoginmethod’s callback function parameter (cb), read WebAuth on auth0.js documentation. -
Reload the
loginCaptchaandsignupCaptchacomponents in your generic error handling logic.
Configure CAPTCHA templates
When you call therenderCaptcha and renderSignupCaptcha methods, you can configure the template for each supported CAPTCHA provider through the options parameter.
The templates property in the options parameter supports the following properties:
| Name | Description |
|---|---|
auth0 | Template function receiving the challenge and returning a string. |
recaptcha_v2 | Template function receiving the challenge and returning a string. |
recaptcha_enterprise | Template function receiving the challenge and returning a string. |
hcaptcha | Template function receiving the challenge and returning a string. |
friendly_captcha | Template function receiving the challenge and returning a string. |
arkose | Template function receiving the challenge and returning a string. |
auth0_v2 | Template function receiving the challenge and returning a string. |
error | Template function returning a custom error message when the challenge could not be fetched, receives the error as first argument. |
Support passwordless flows
If you’d like to support Bot Detection for flows, you must use version9.24 or higher of the auth0.js library.
<script src="https://cdn.auth0.com/js/auth0/9.24/auth0.min.js"></script>
-
Add an element to render the CAPTCHA above the submit button. If you also support a username/password login, a separate element should be created for the passwordless CAPTCHA. For example:
<div class="passwordless-captcha-container"></div> -
Initialize the CAPTCHA component for passwordless flows after the WebAuth constructor.
-
Add the captcha property to the Passwordless call, and reload the CAPTCHA component upon errors.